
Setup
Azure App Registration — 8 Steps
1
Step 1
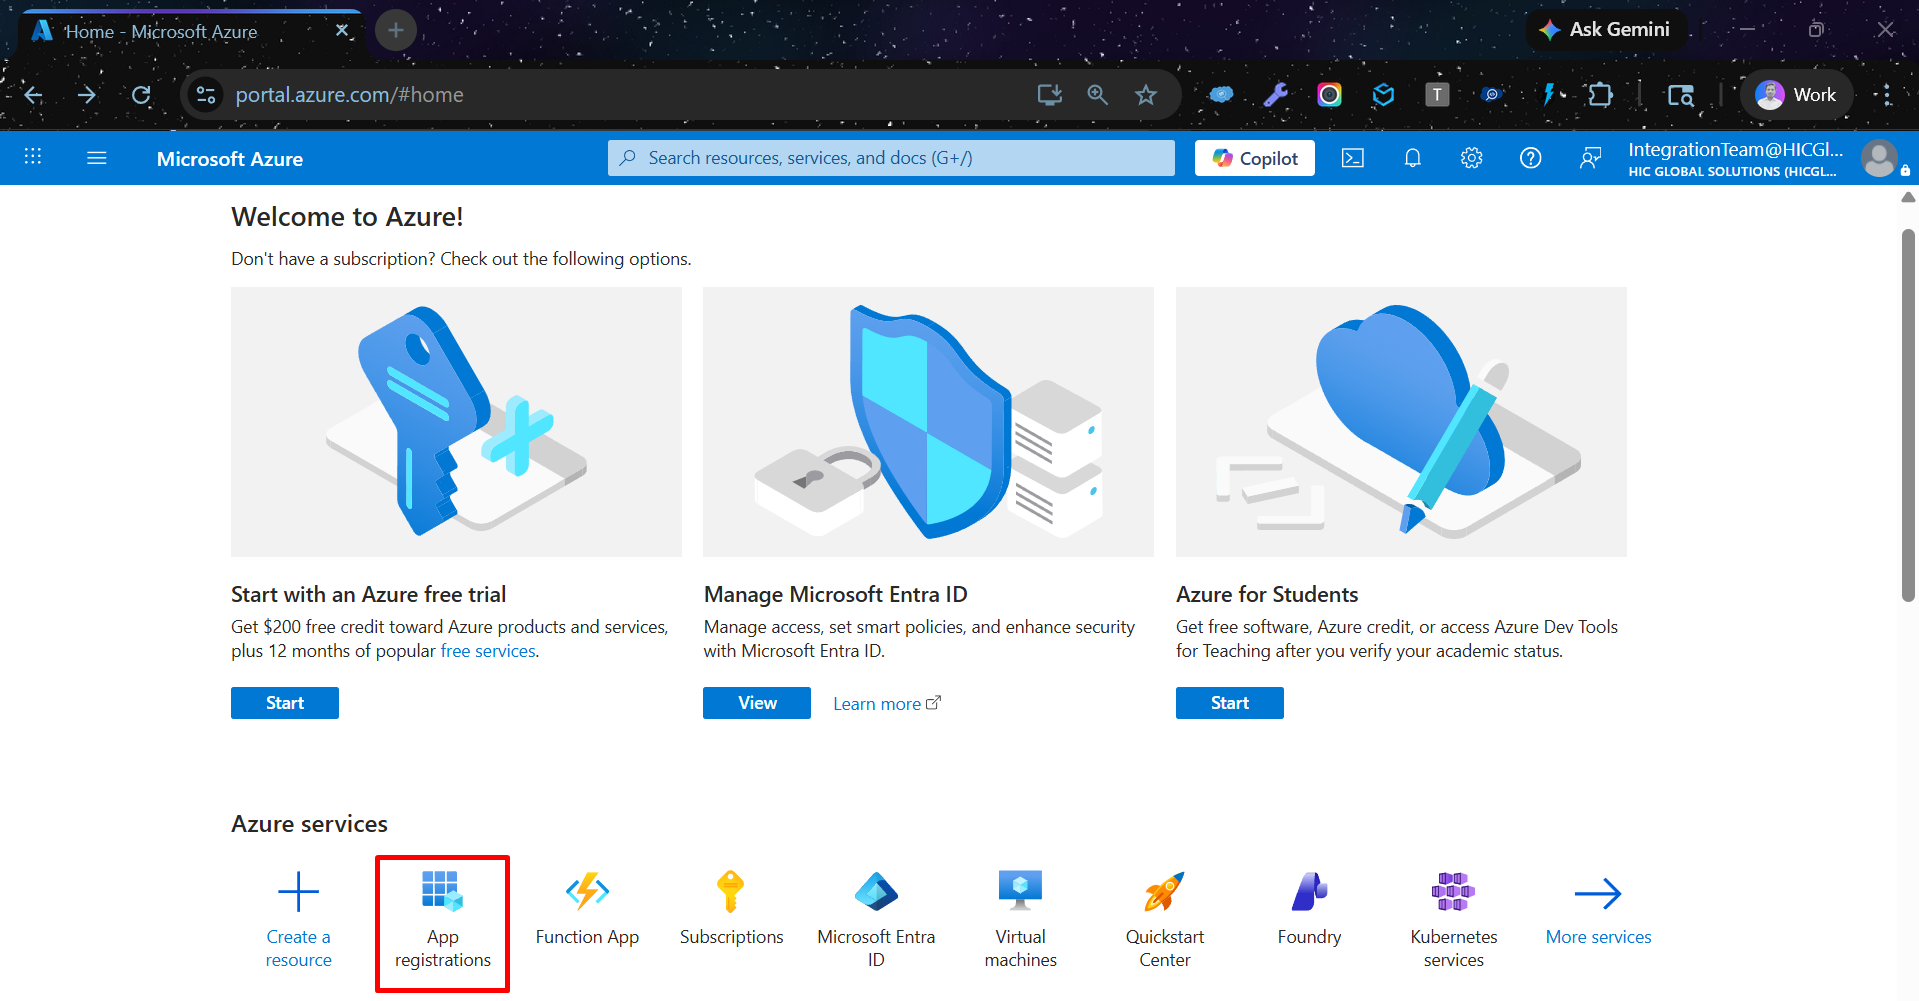
Login to Azure Portal, then navigate to App Registrations
▾
In the Azure services section, click on App registrations. If you don't see it, search for it in the top search bar.
2
Step 2
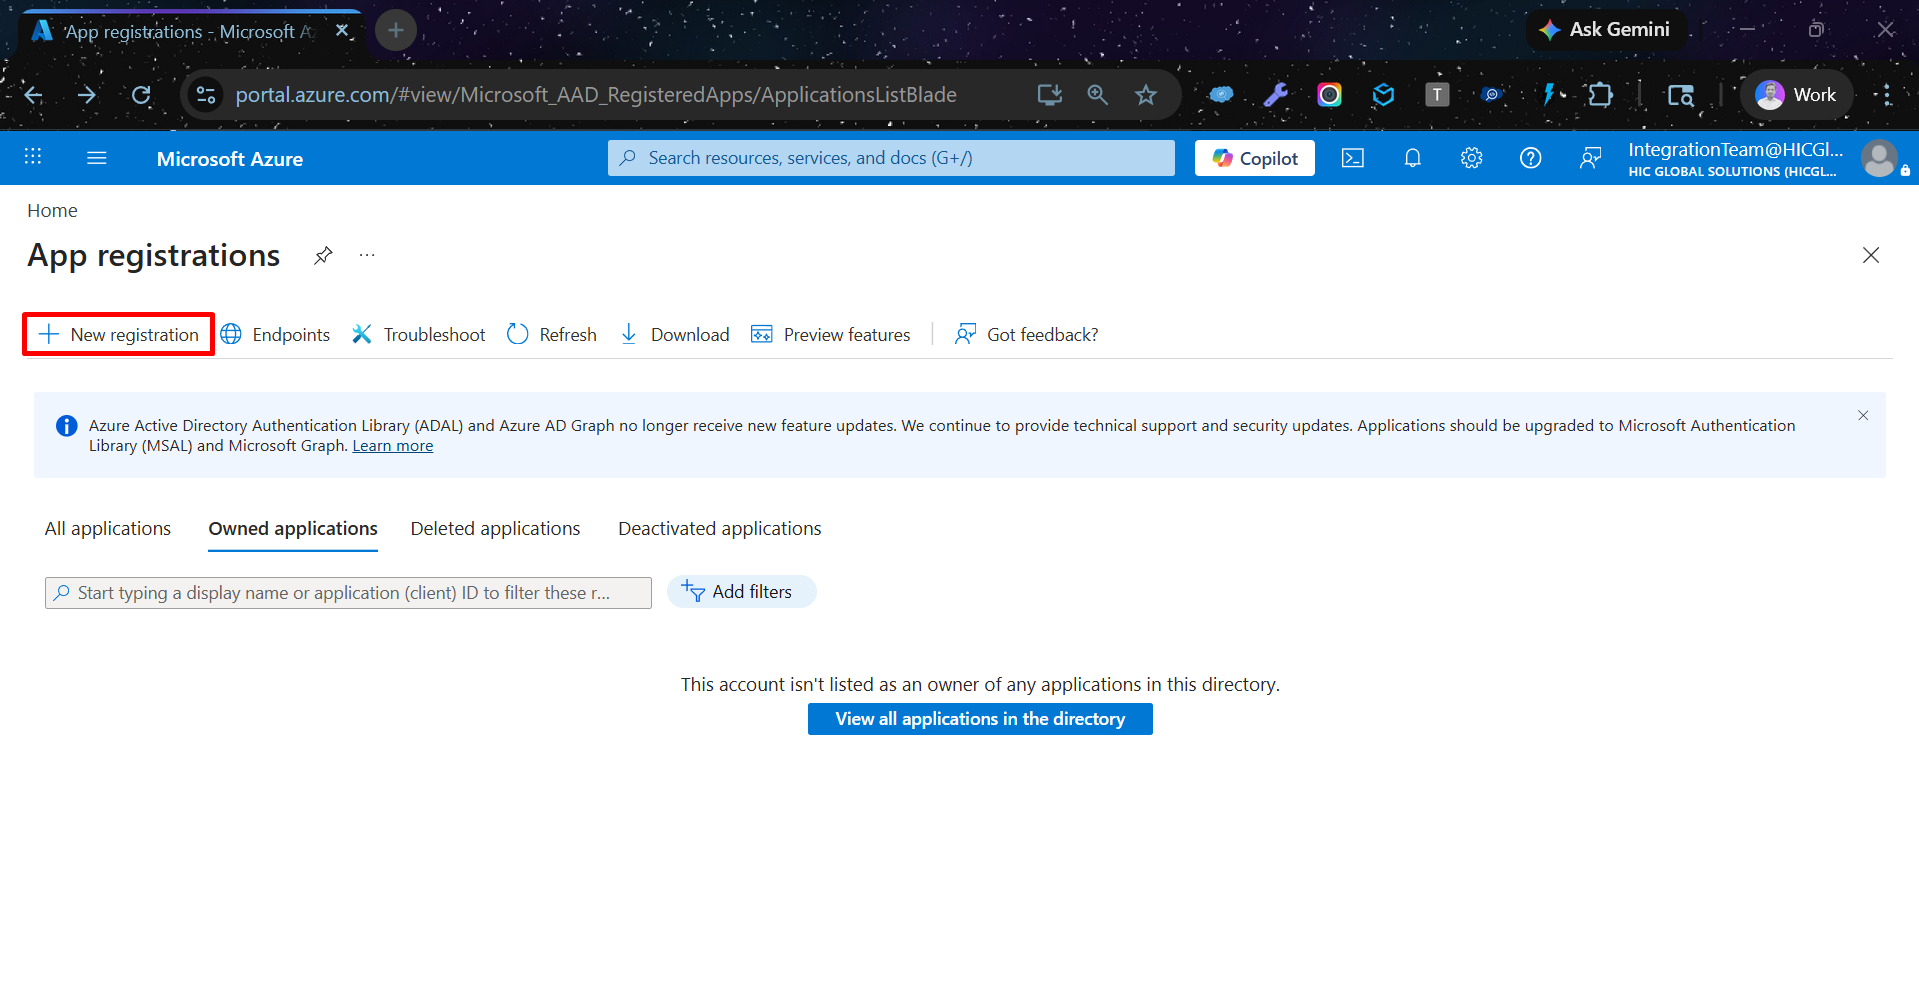
Click + New registration at the top of the page
▾
3
Step 3
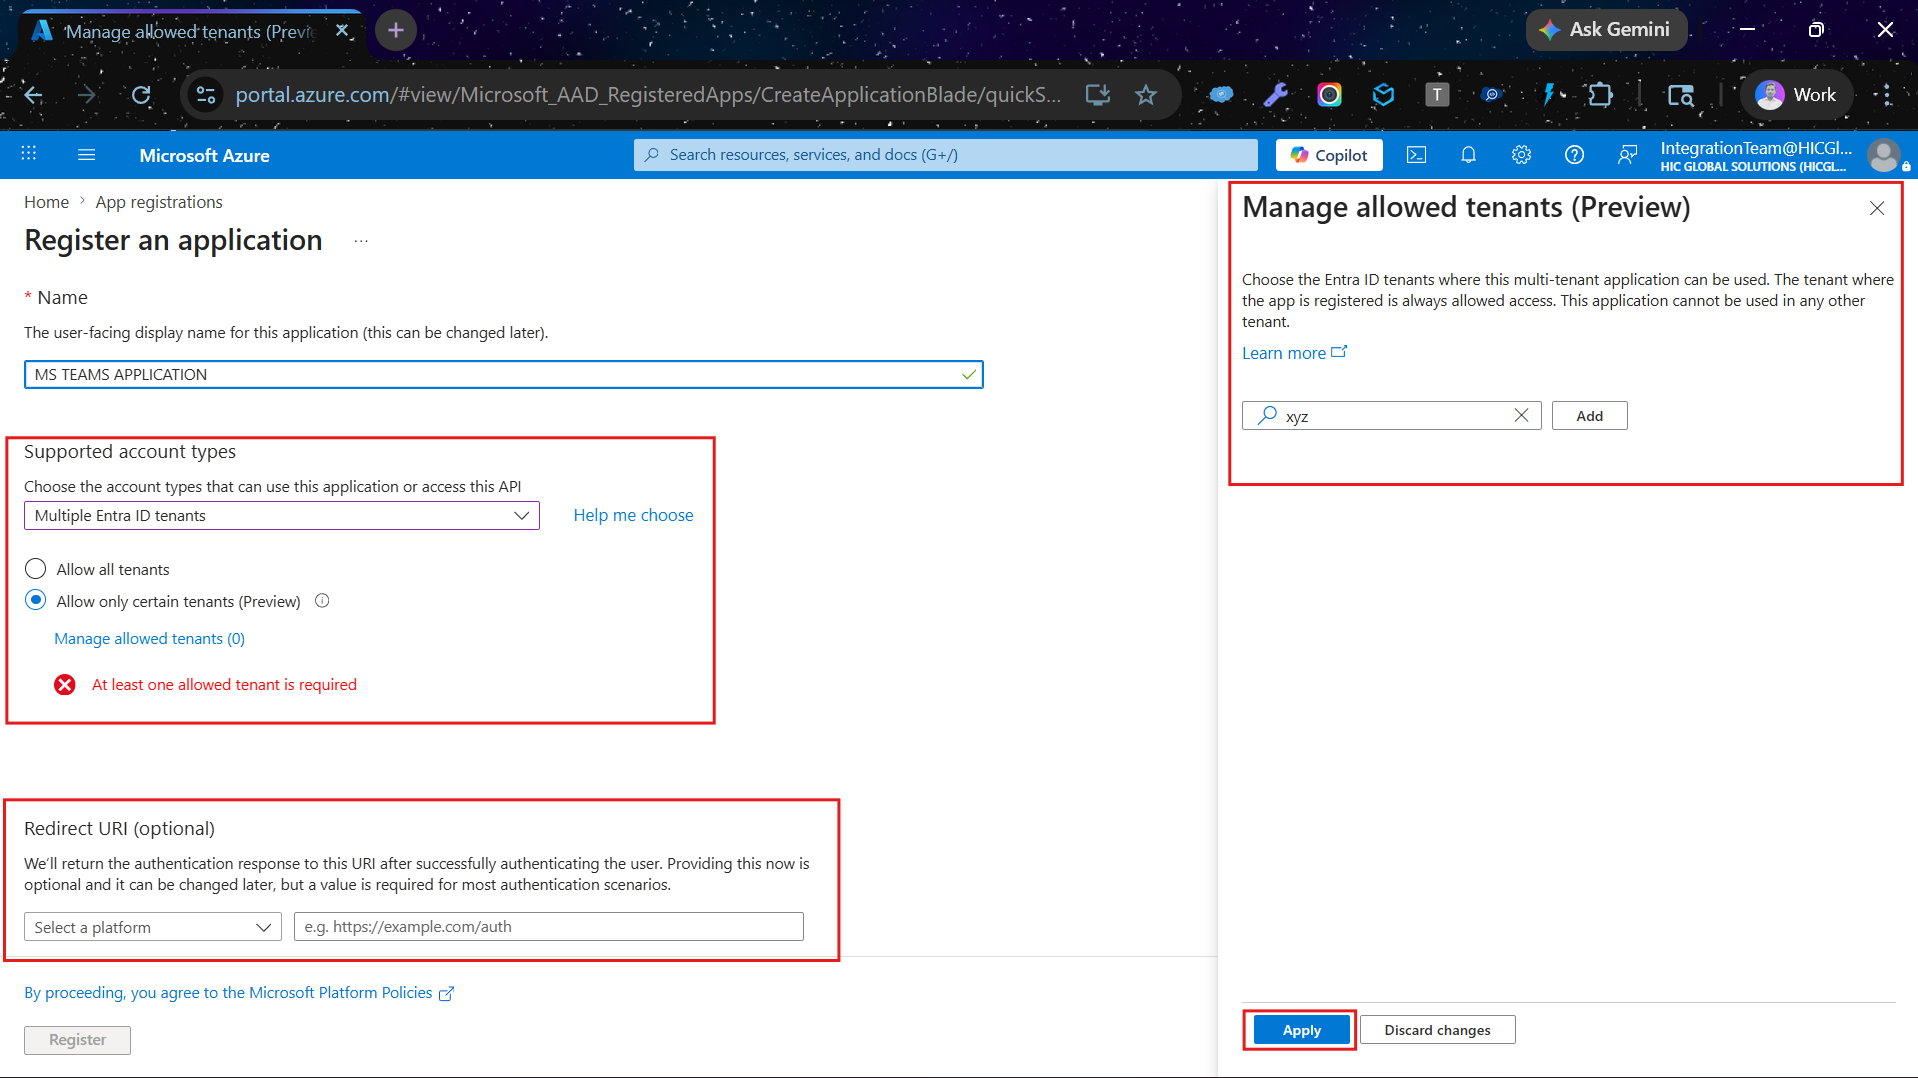
Fill in the App Registration Form
▾
- Type your app name
- Click on the circle next to "Multiple Entra ID tenants" to select it
- Click on "Allow only certain tenants (Preview)" circle
- Select a platform (Redirect URI)
- Check the box for "By proceeding, you agree to the Microsoft Platform Policies", then click the Register button at the bottom
4
Step 4
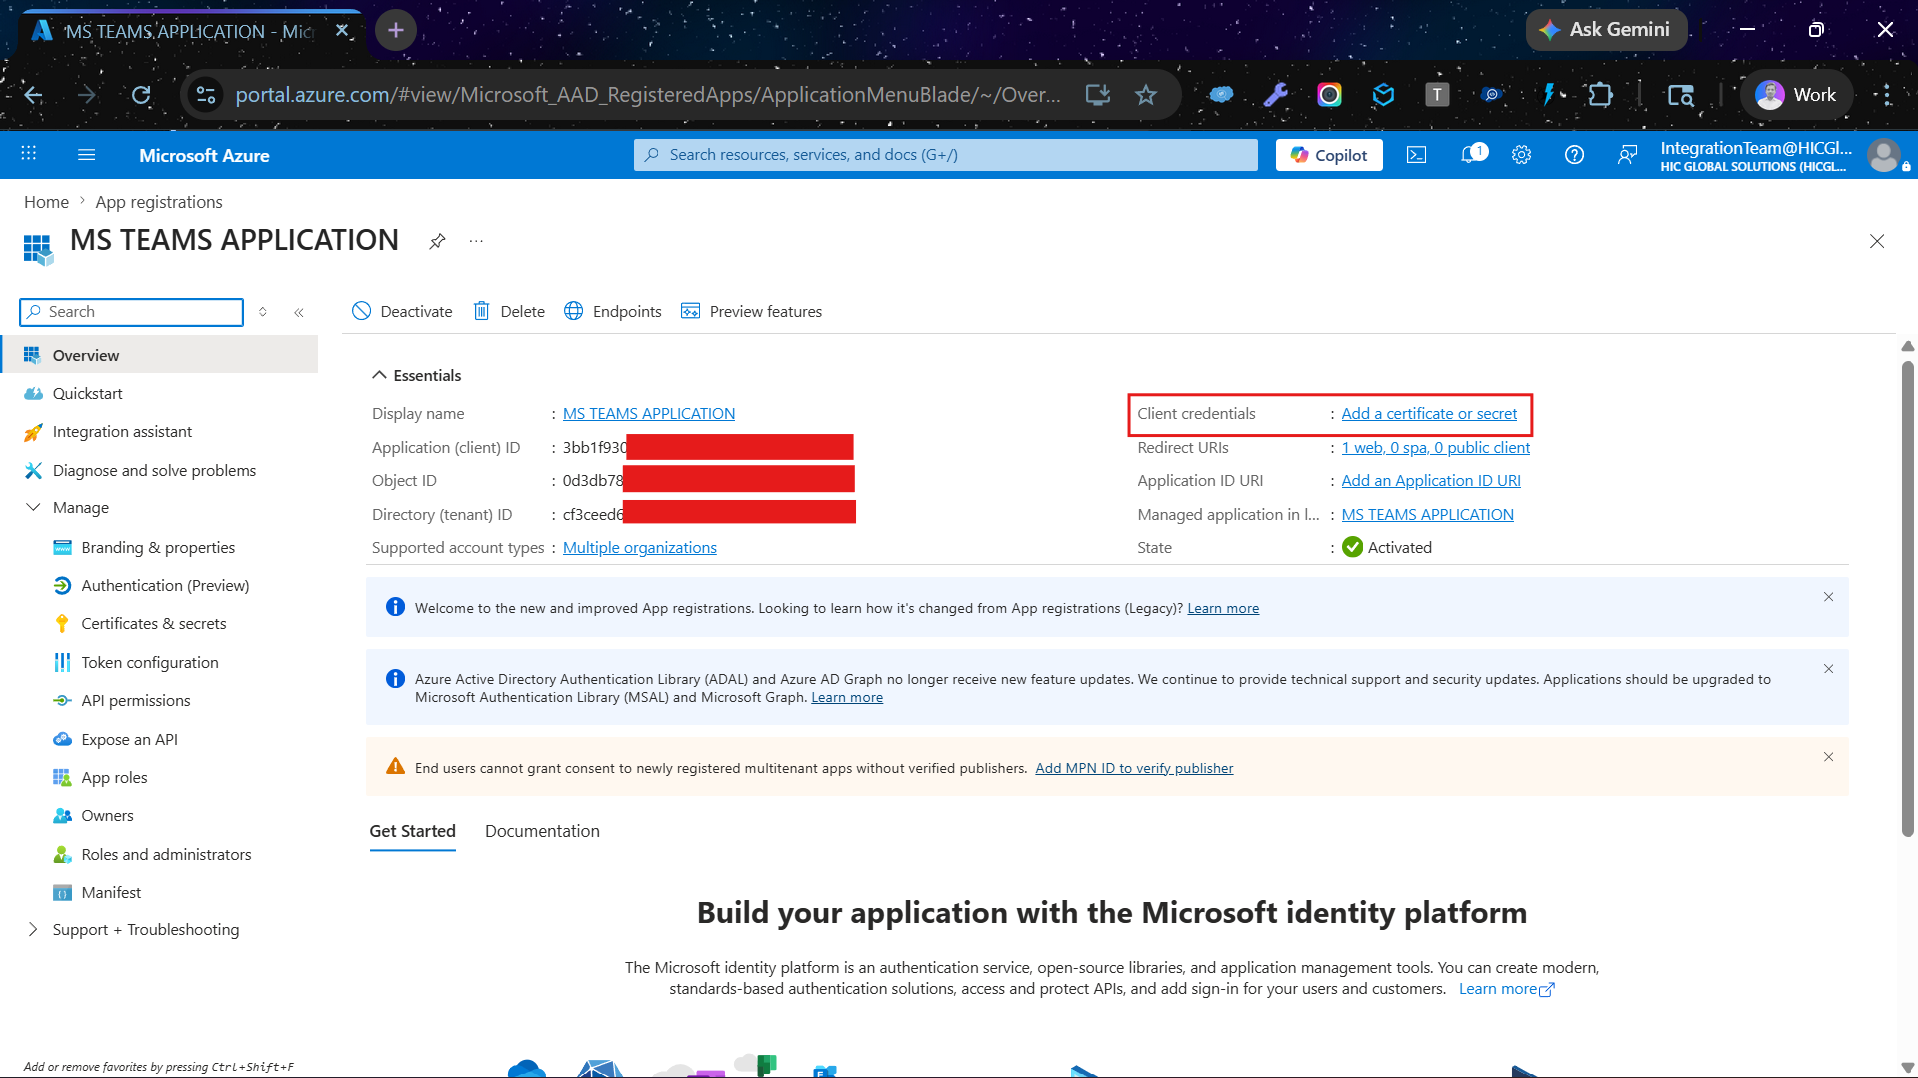
Click on Client Credentials, then click "Add a certificate or secret"
▾
5
Step 5
Click "New client secret", then add the Client Secret
▾
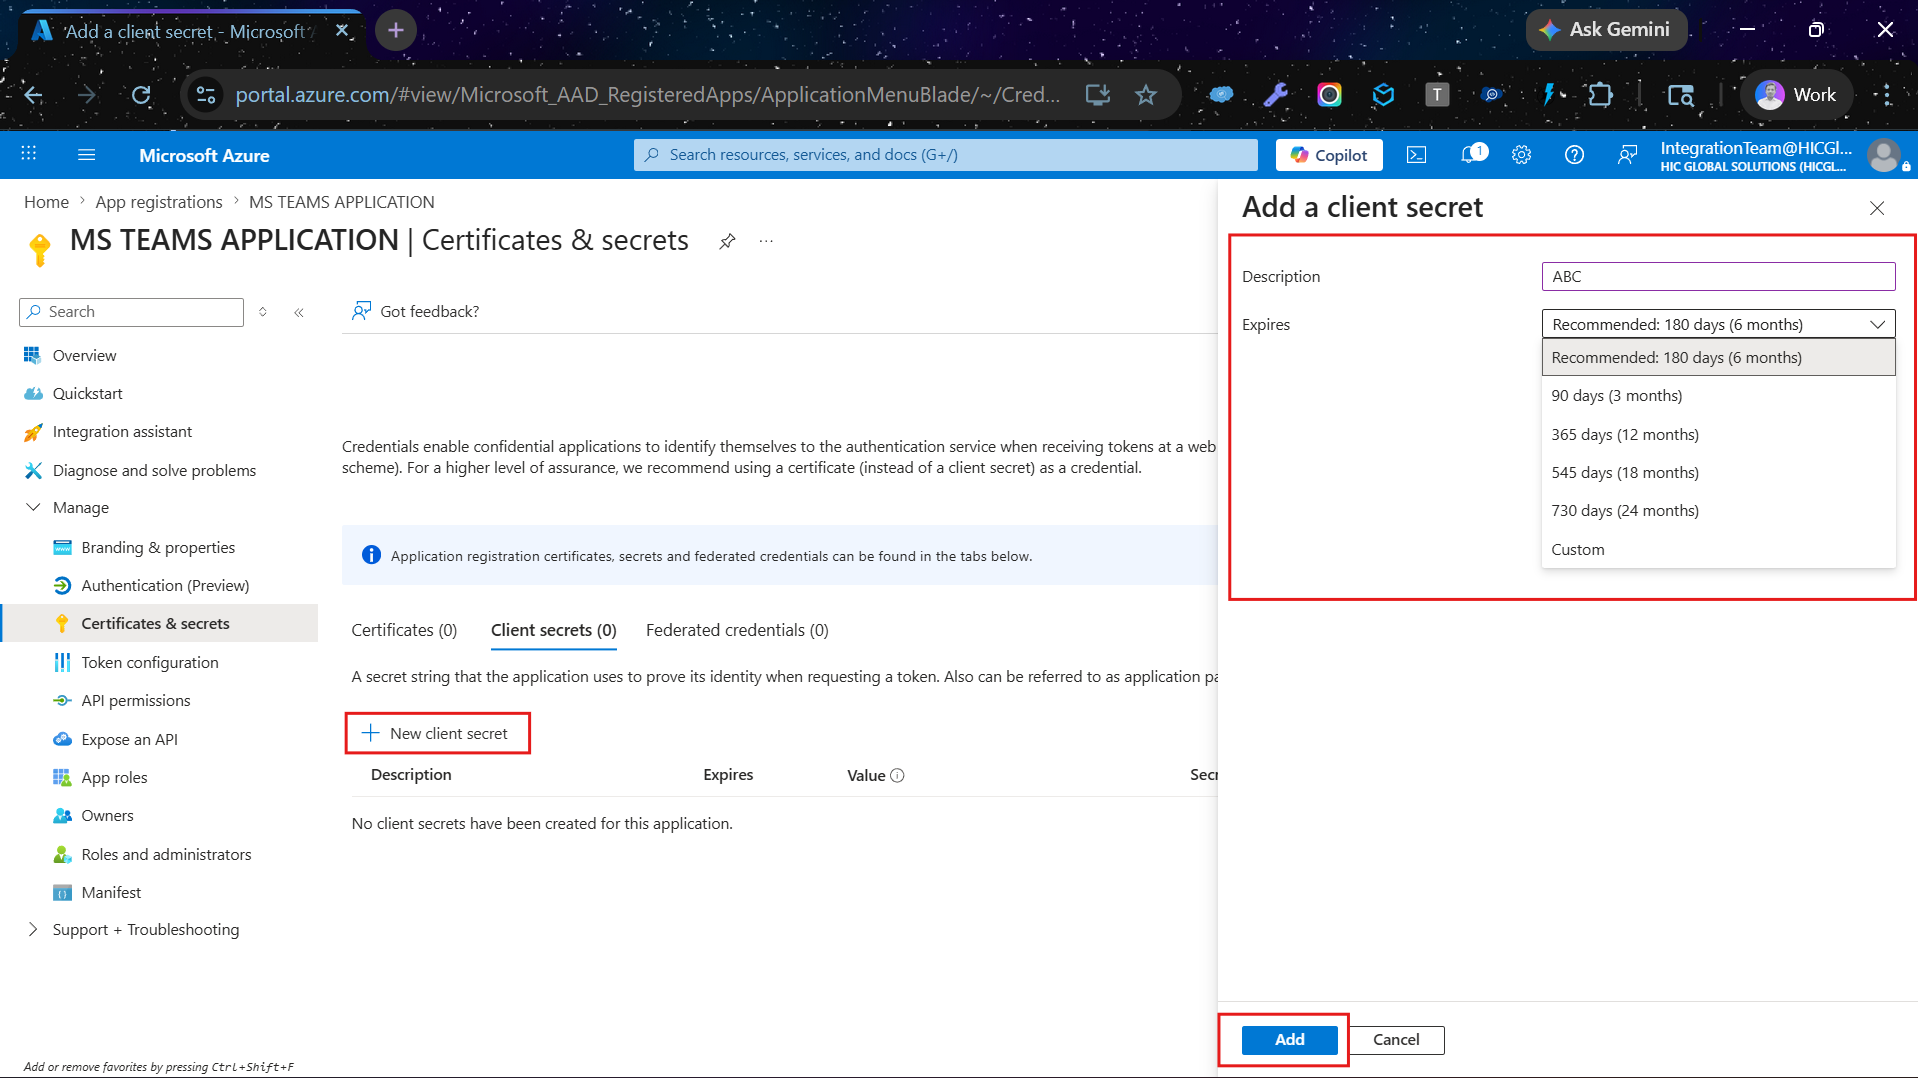
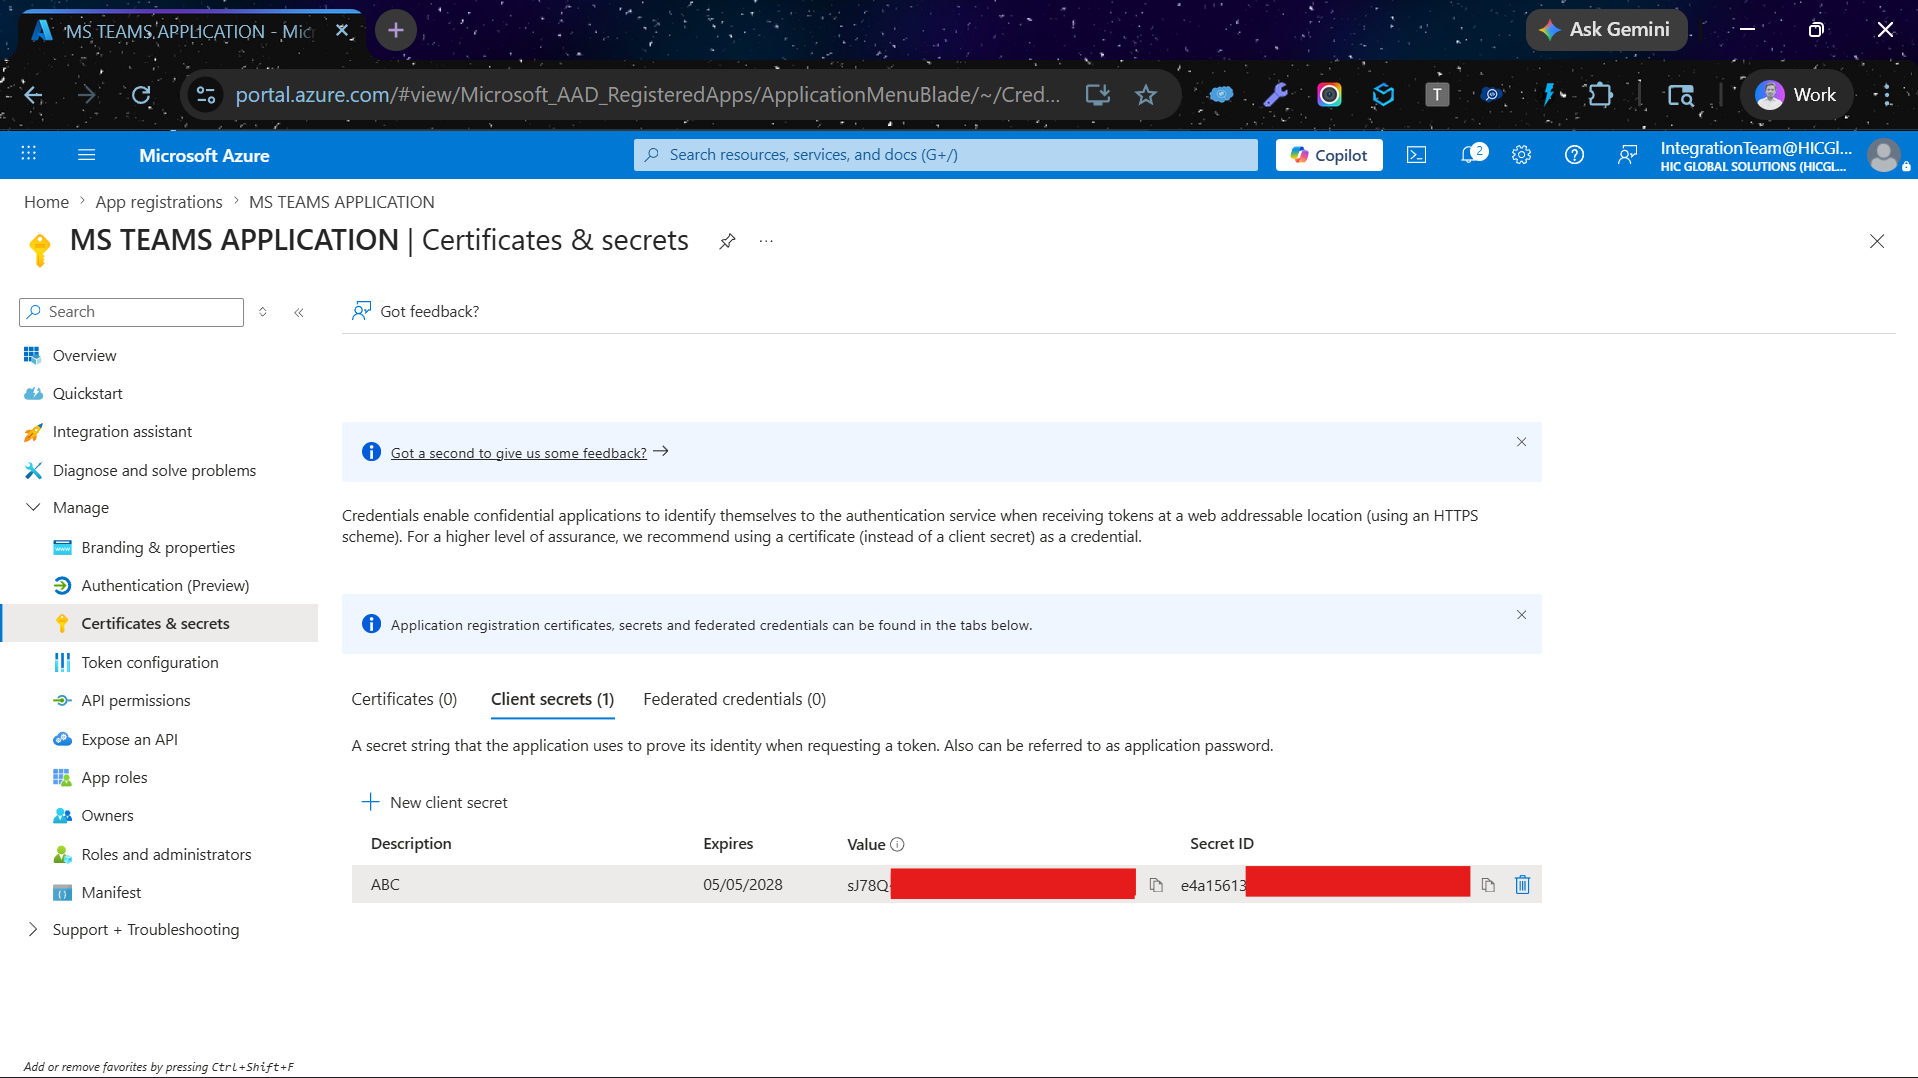
Important: Before moving to any next steps, you must copy the secret value immediately — it is shown only once.
6
Step 6
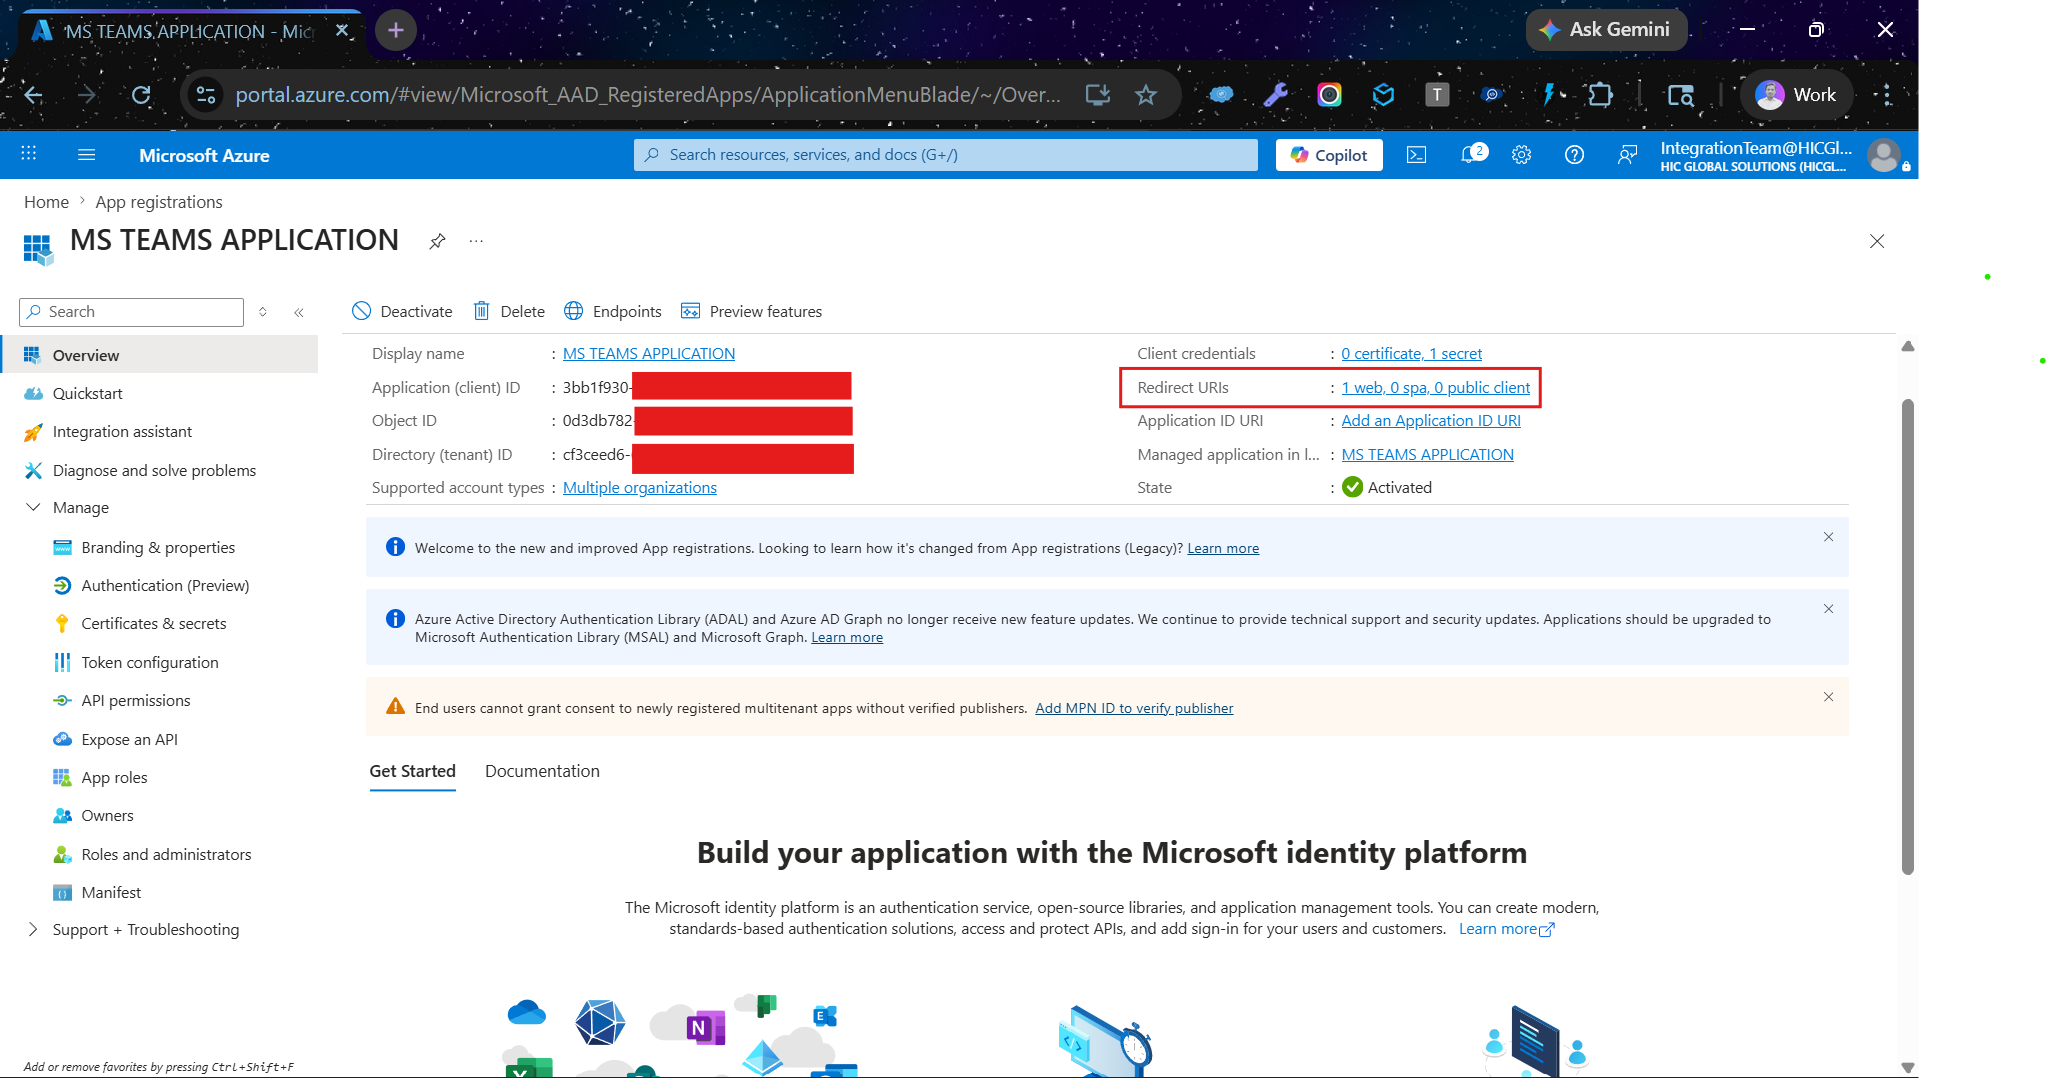
Click on Redirect URIs
▾
7
Step 7
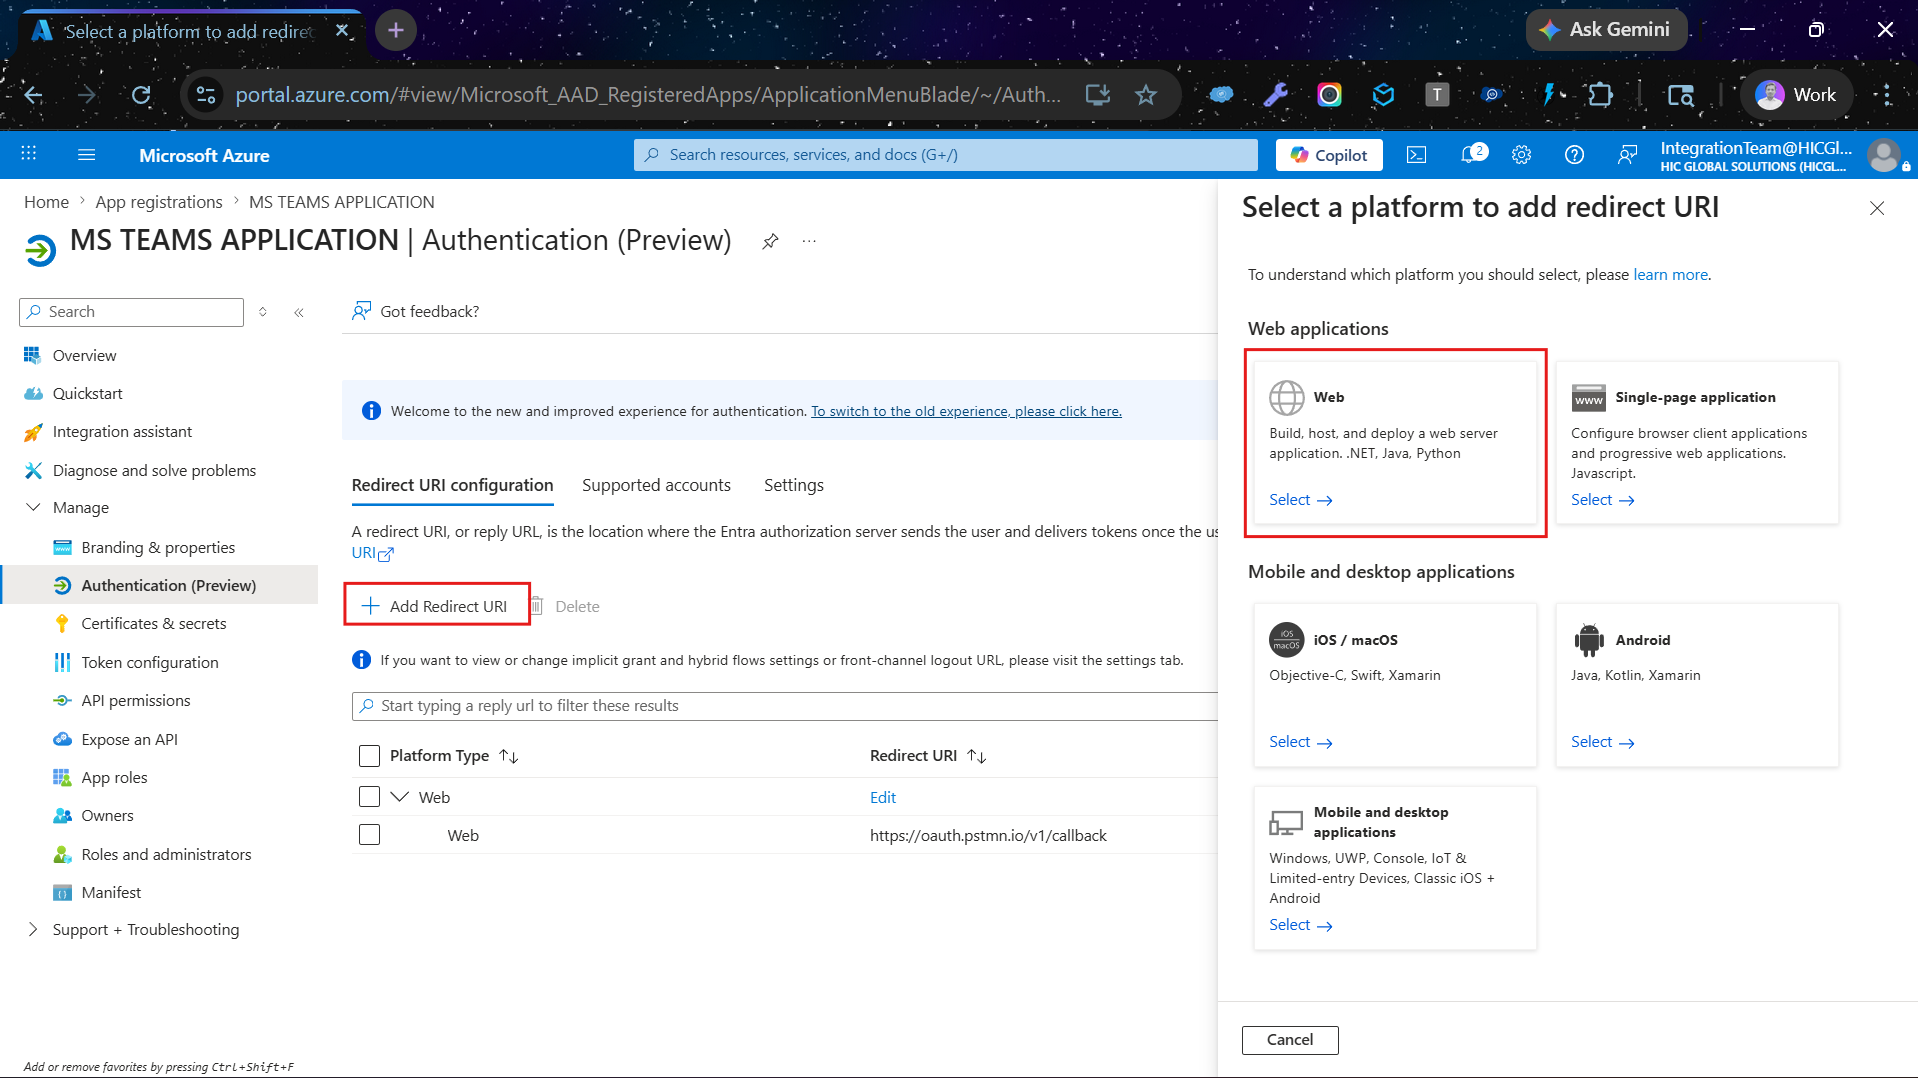
Click + Add Redirect URI, then select Web
▾
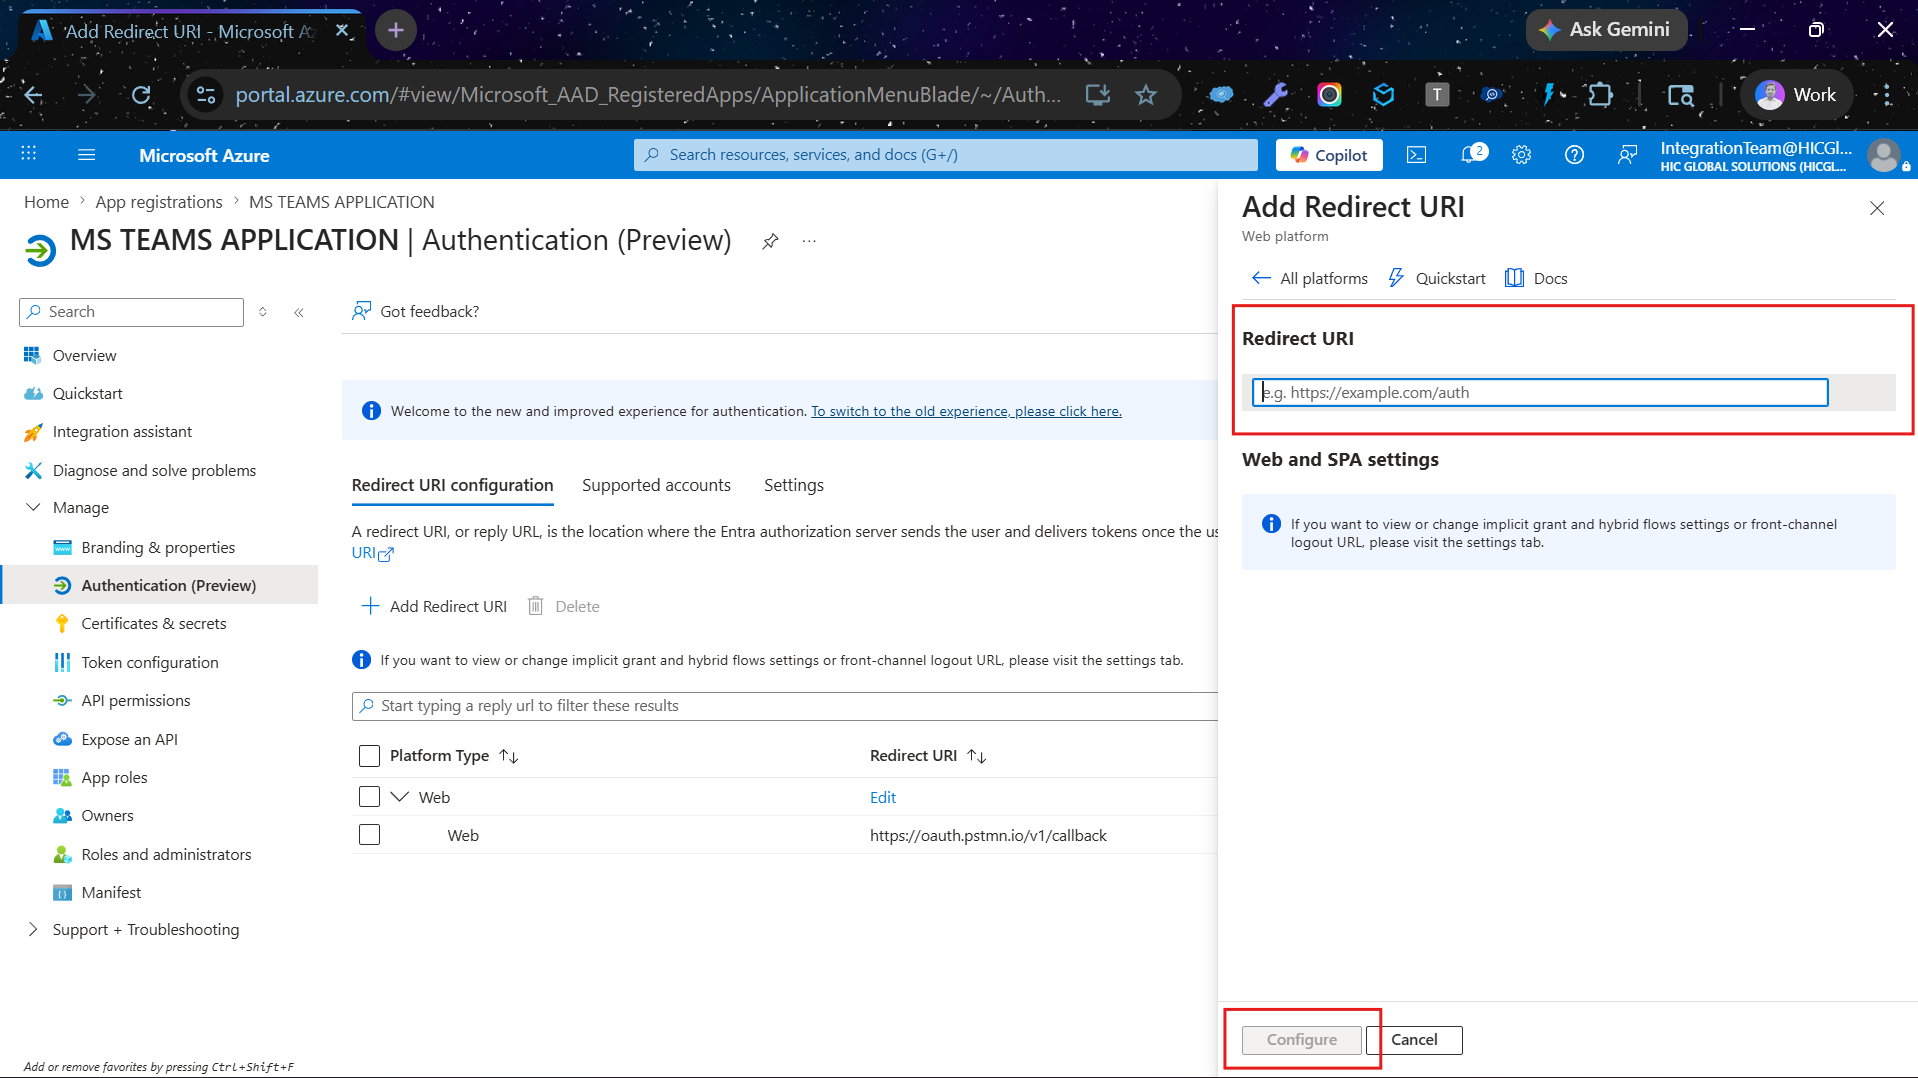
8
Step 8
Add the Redirect URI, then click the Configure button
▾
✓
After clicking the Configure button, your Connected App has been successfully created.
Admins
Admin Permissions
Public