
Admins
Admin Setup — 24 Steps
1
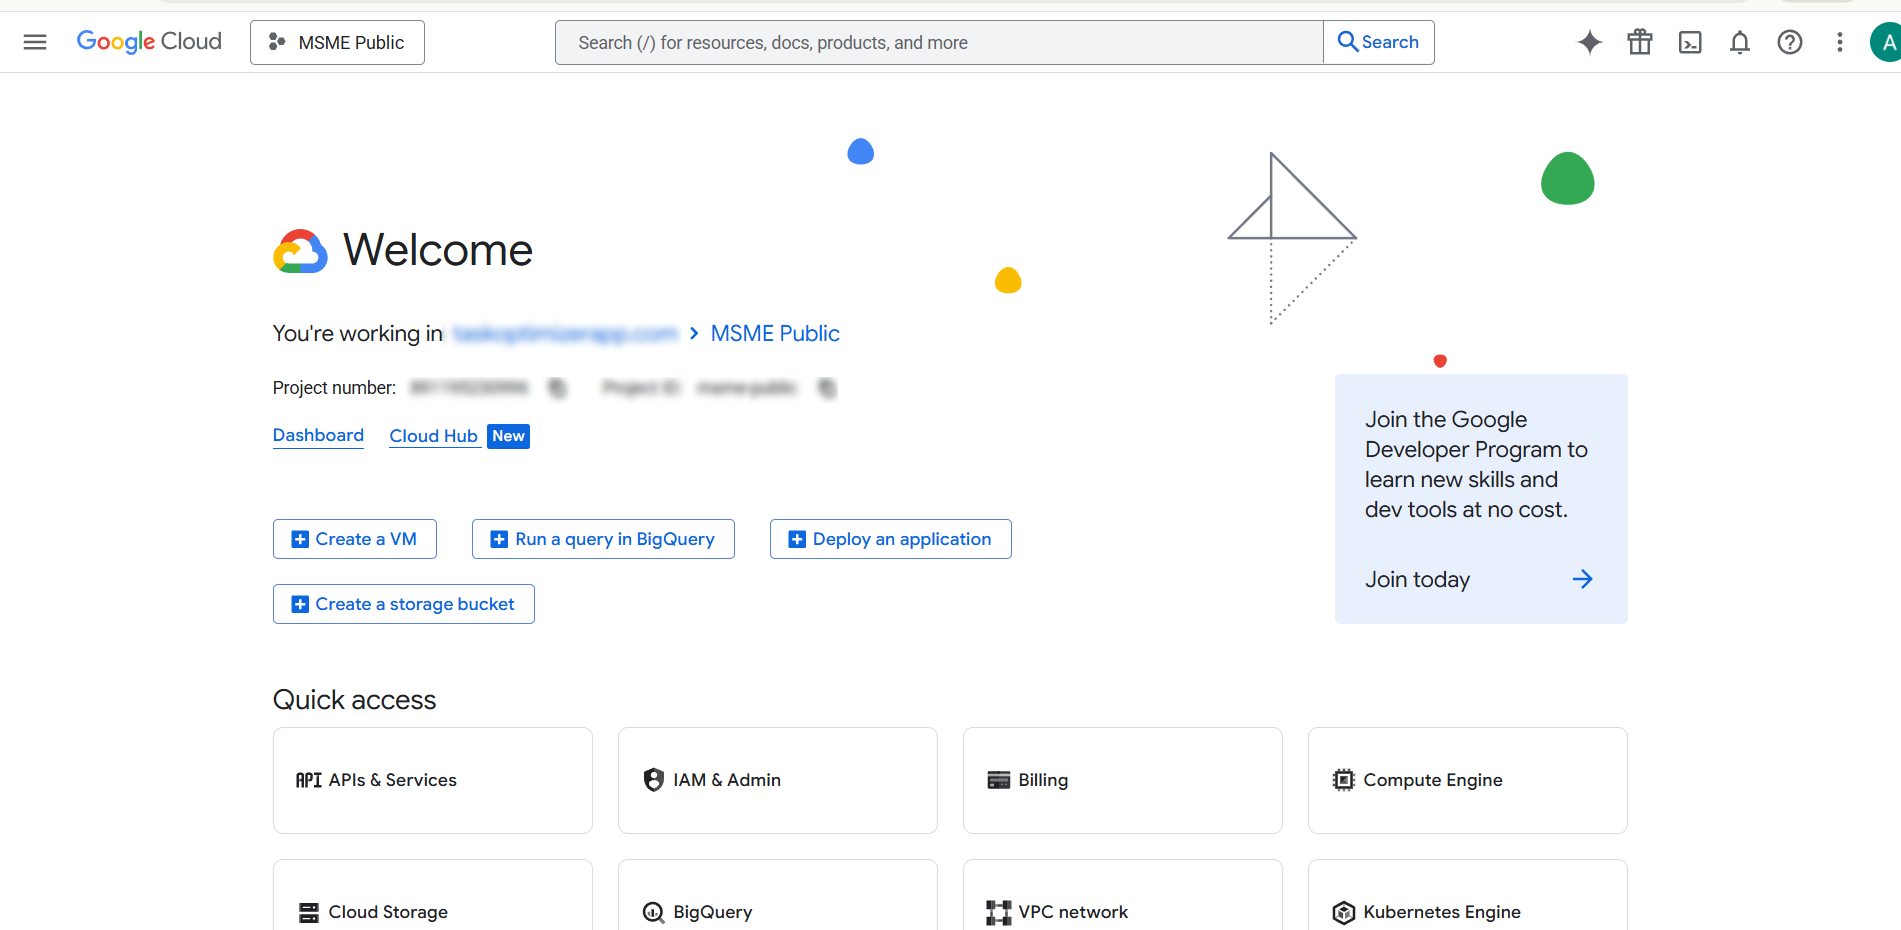
Step 1
Navigate to
https://console.cloud.google.com▾
2
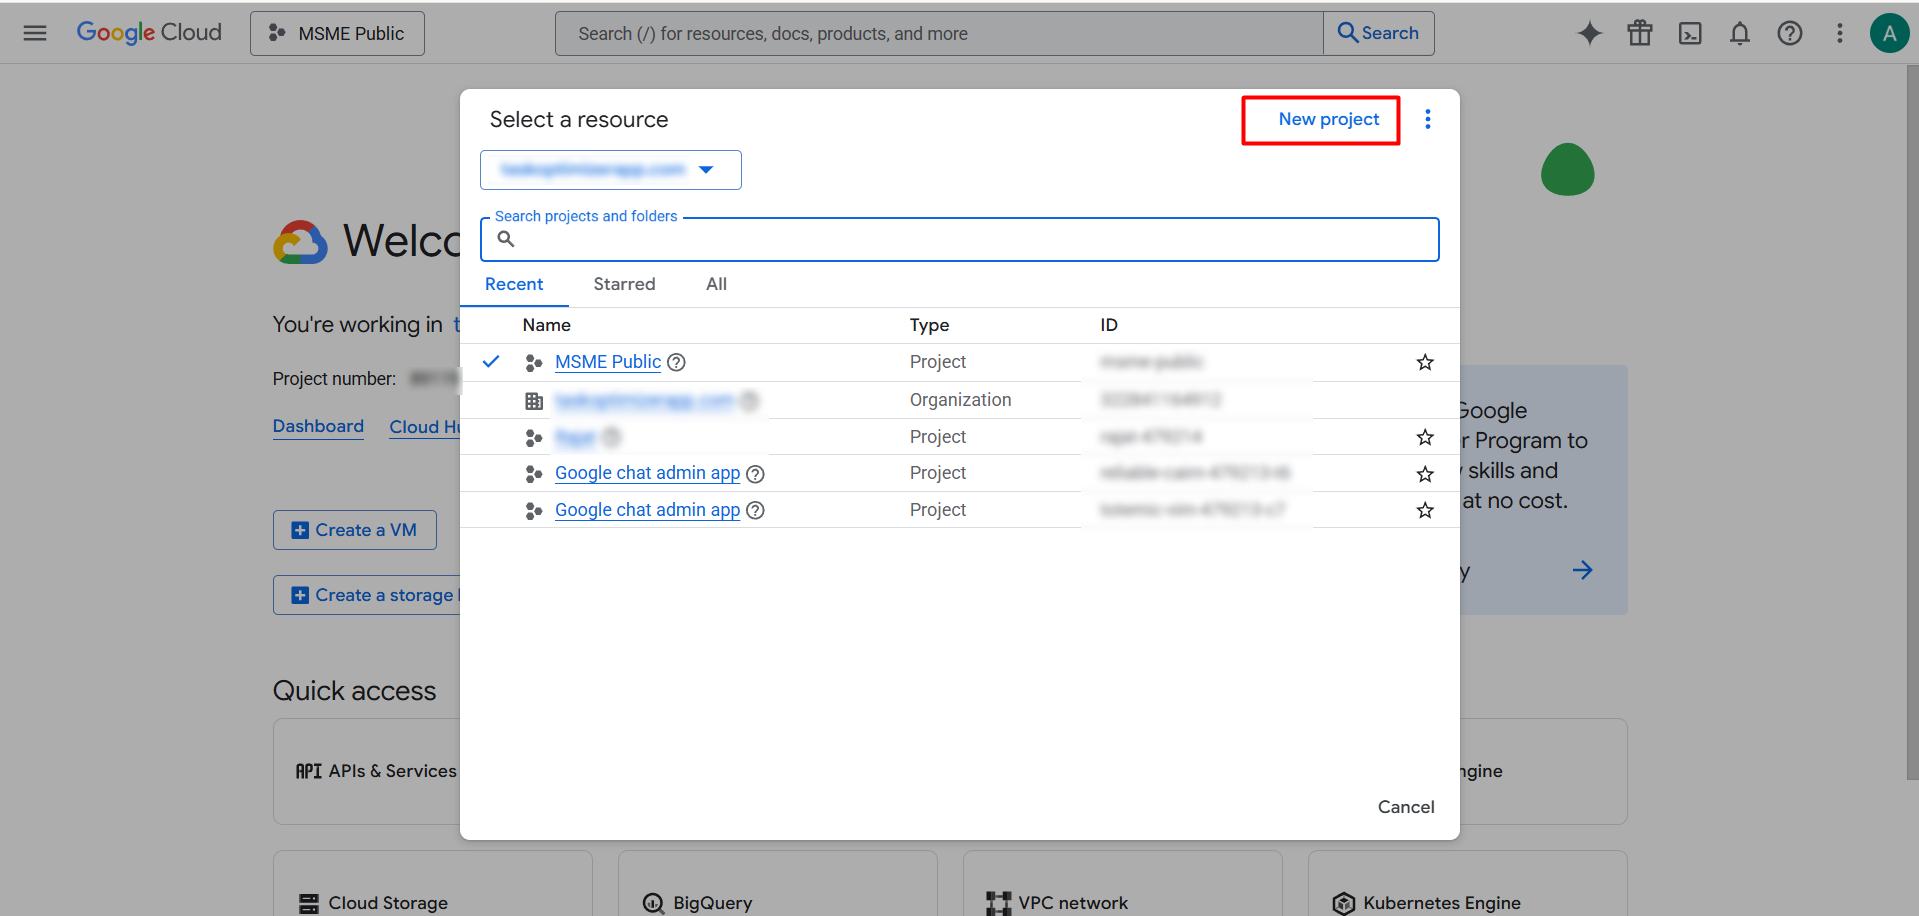
Step 2
Click the Project dropdown and select "New Project"
▾
3
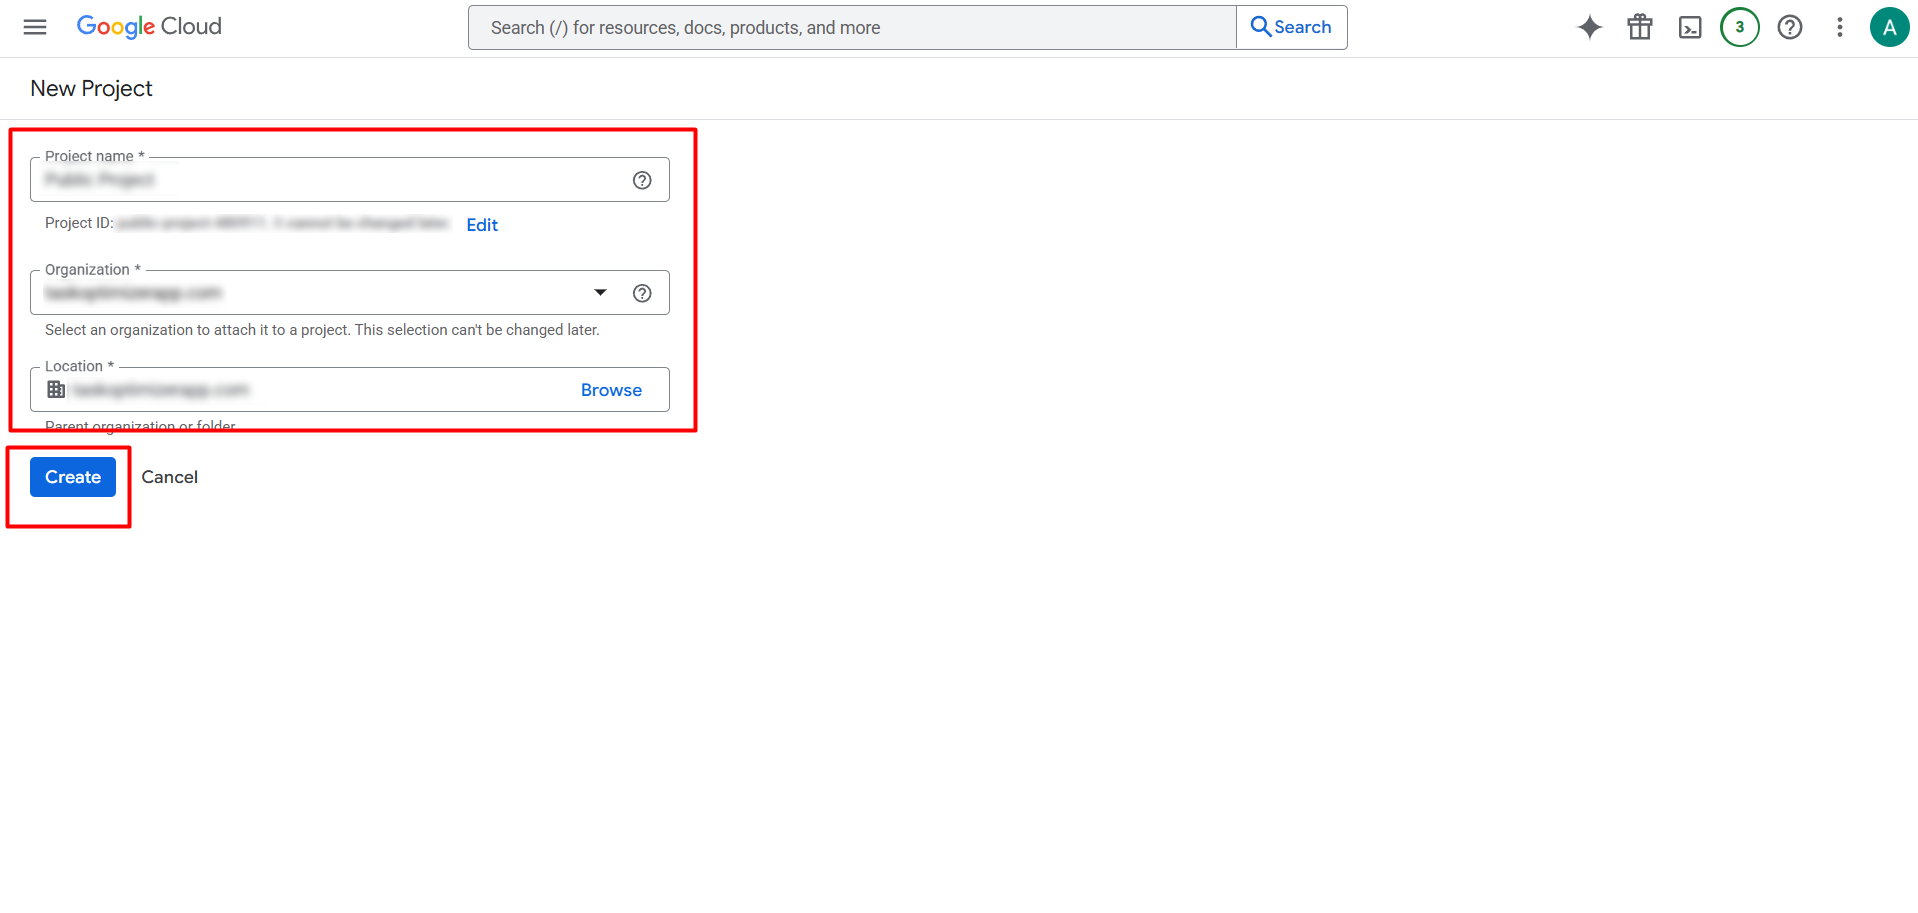
Step 3
Enter project details and click "Create"
▾
4
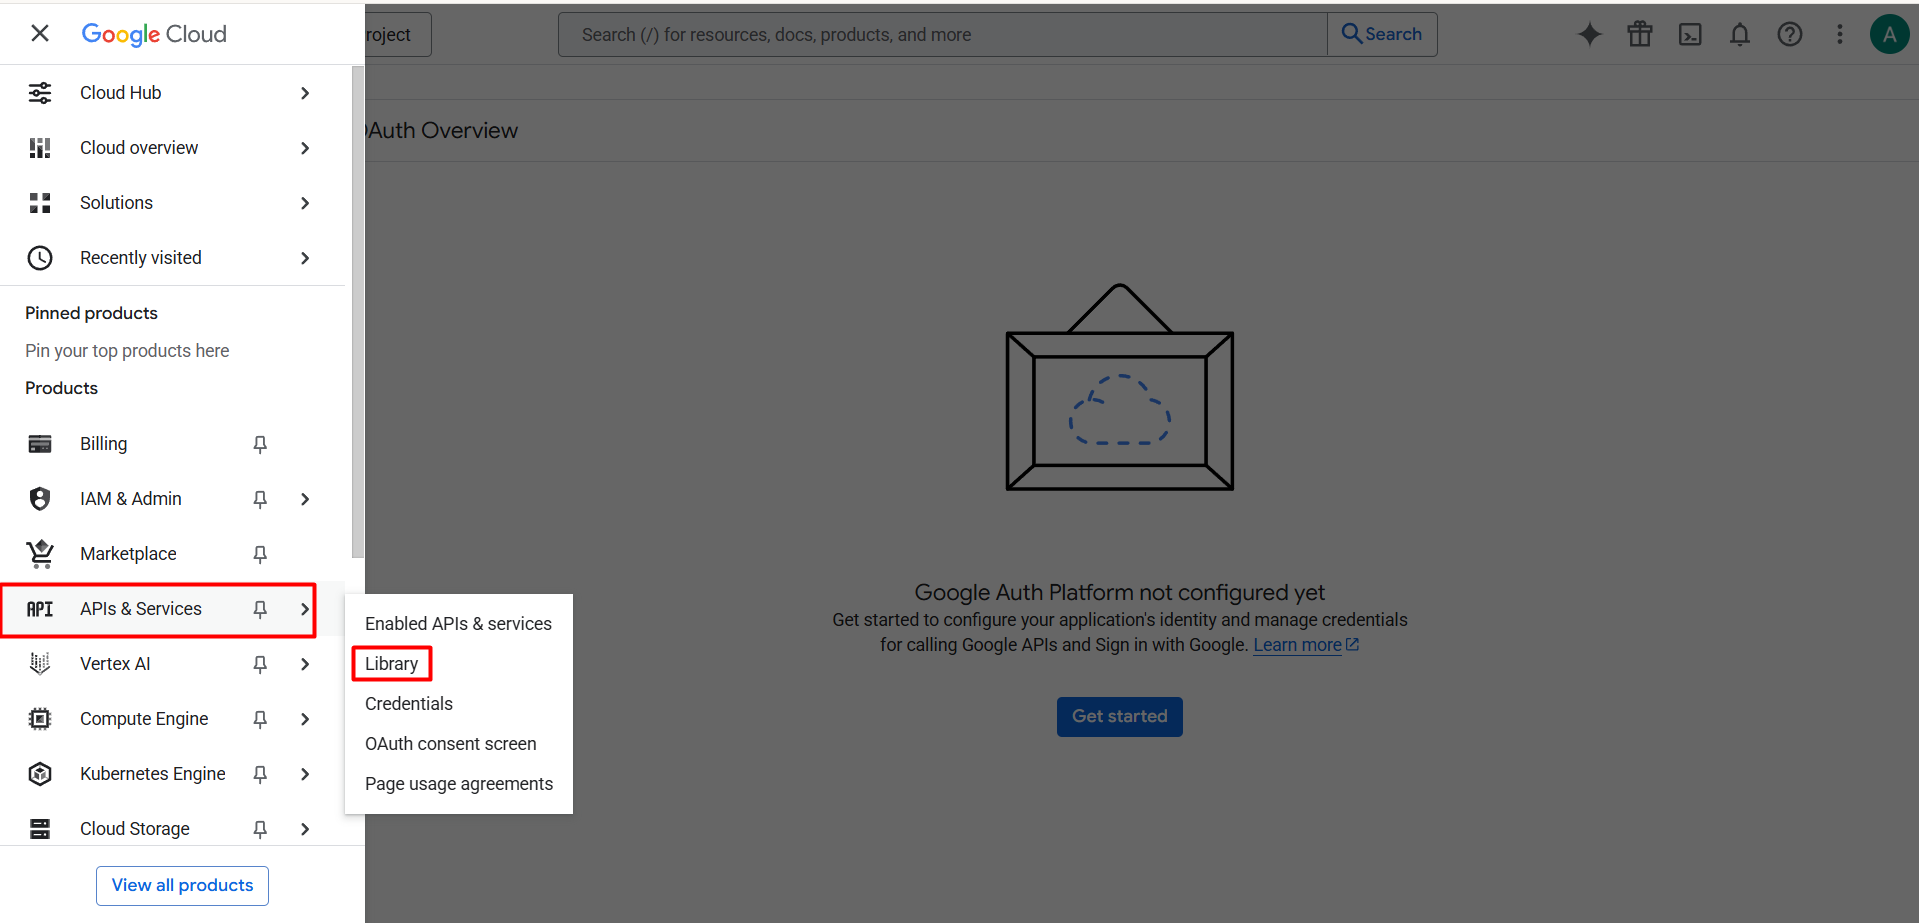
Step 4
Navigate to APIs & Services → Library
▾
5
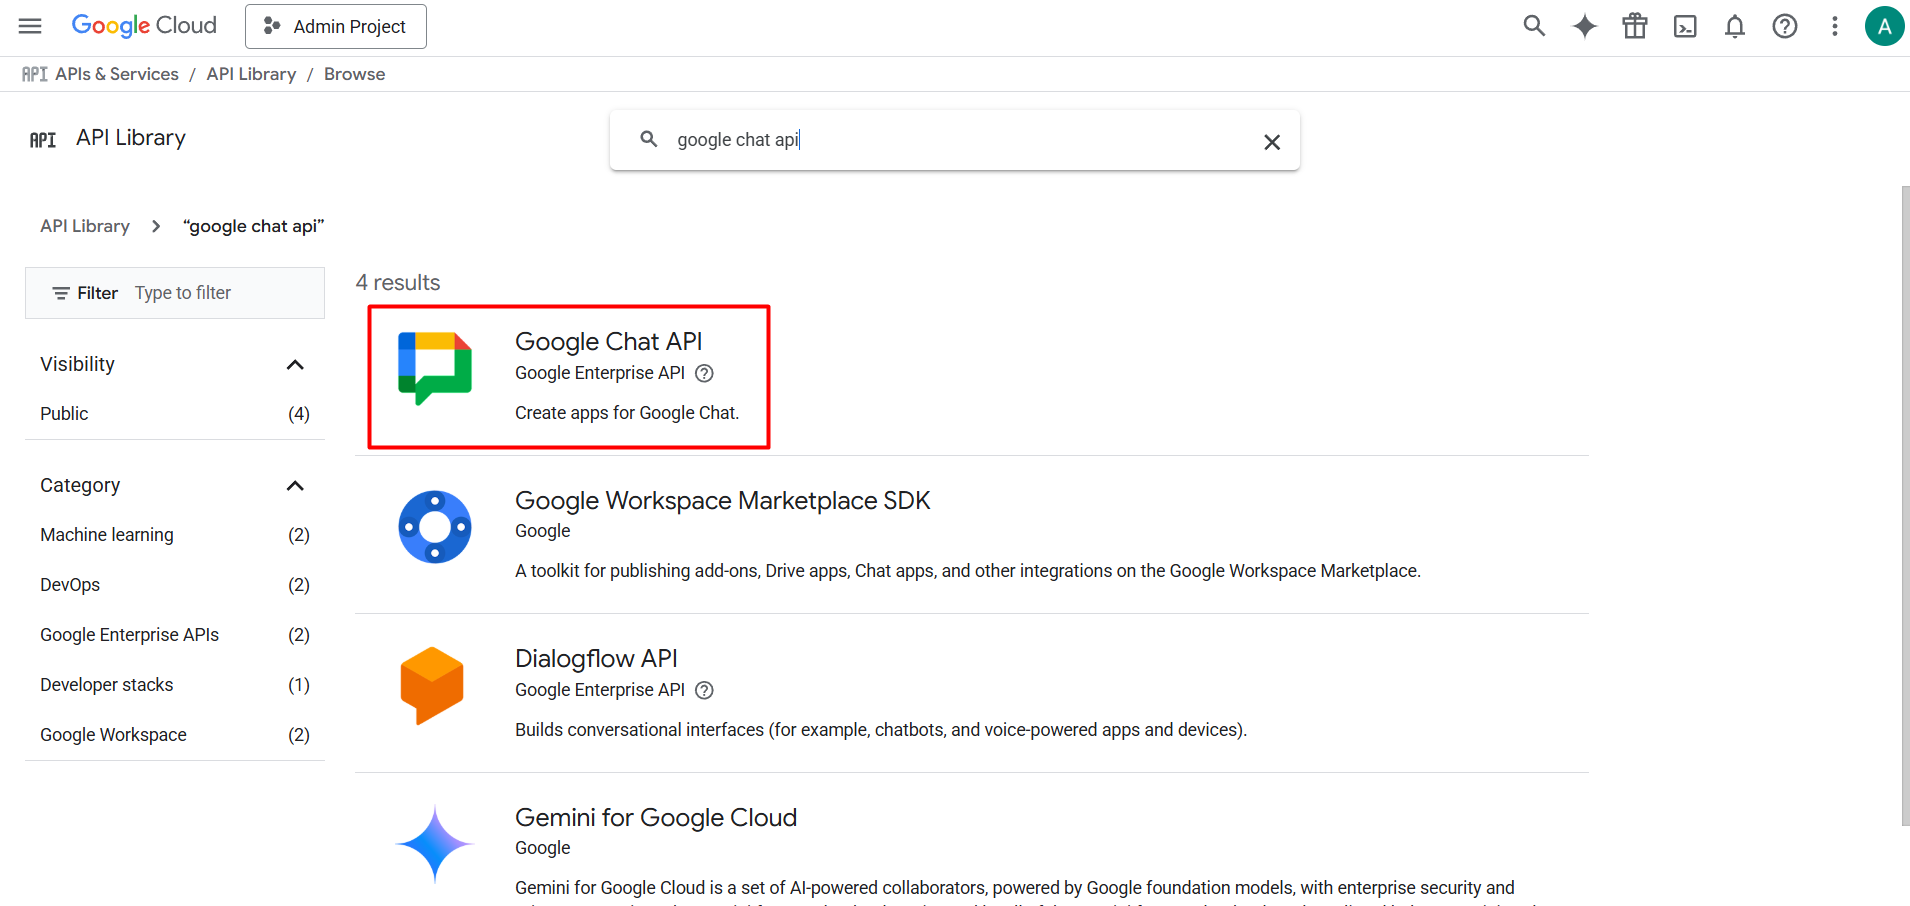
Step 5
Search "Google Chat API" and click the result
▾
6
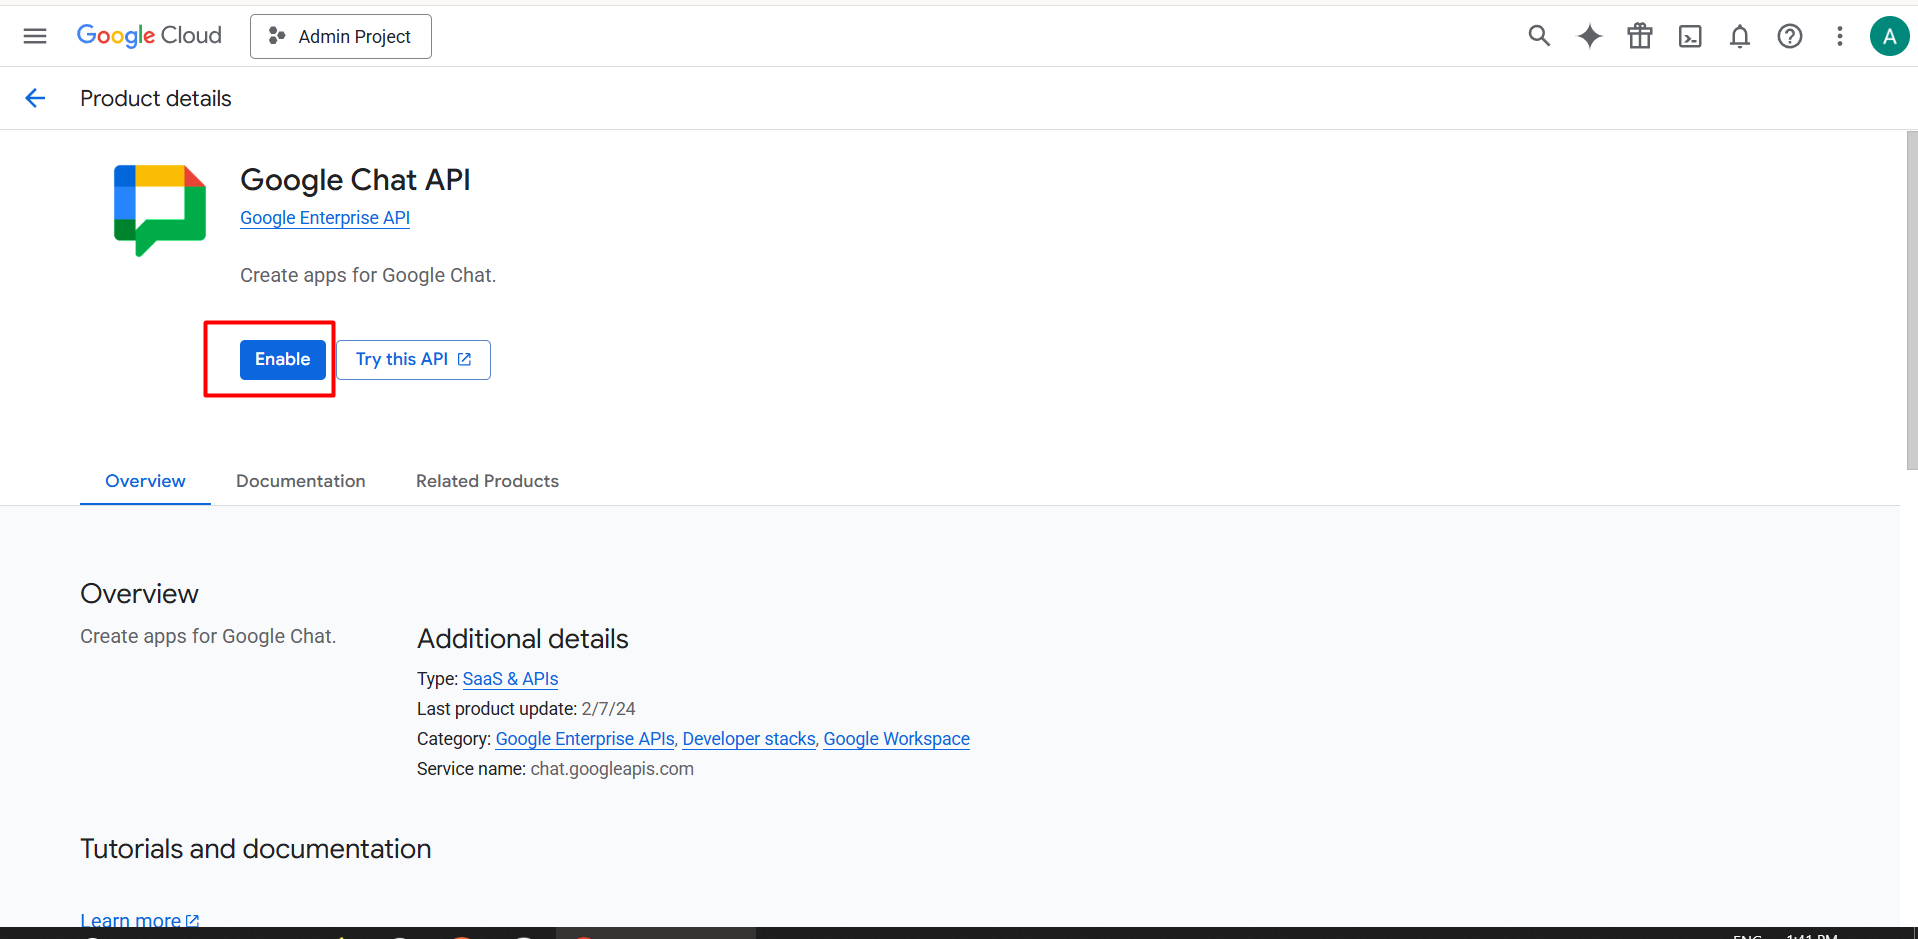
Step 6
Click the Enable button
▾
7
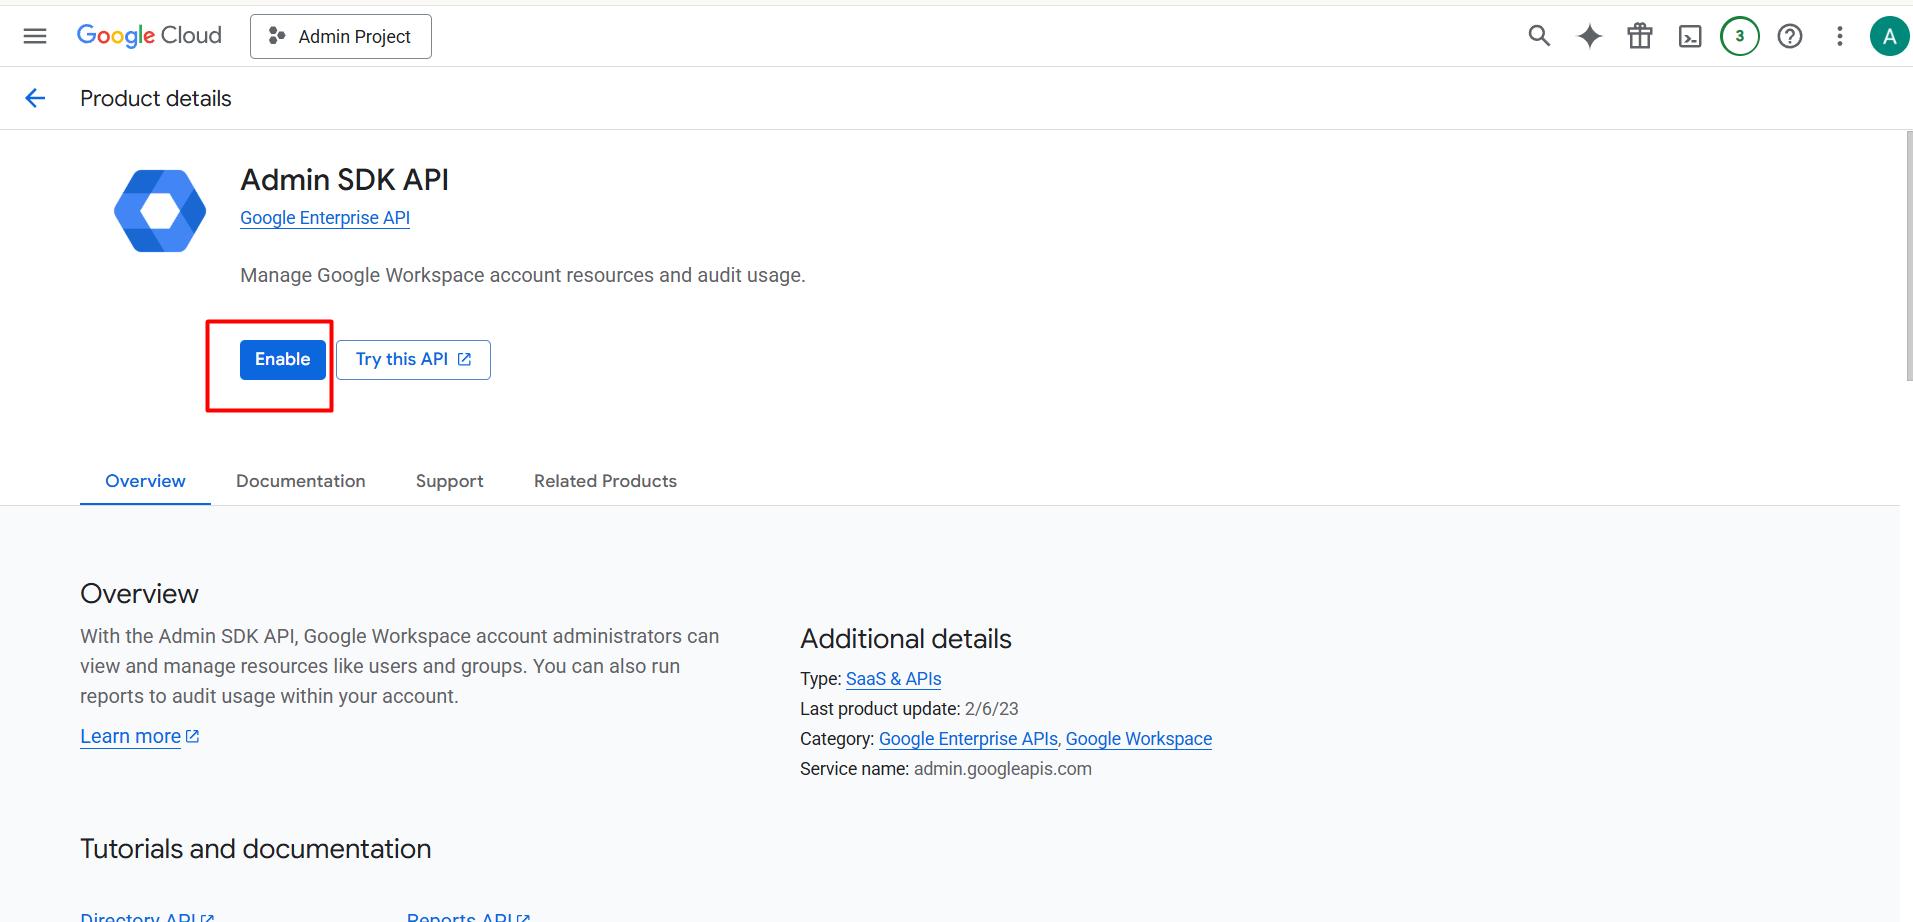
Step 7
Also enable the "Admin SDK API" to proceed
▾
8
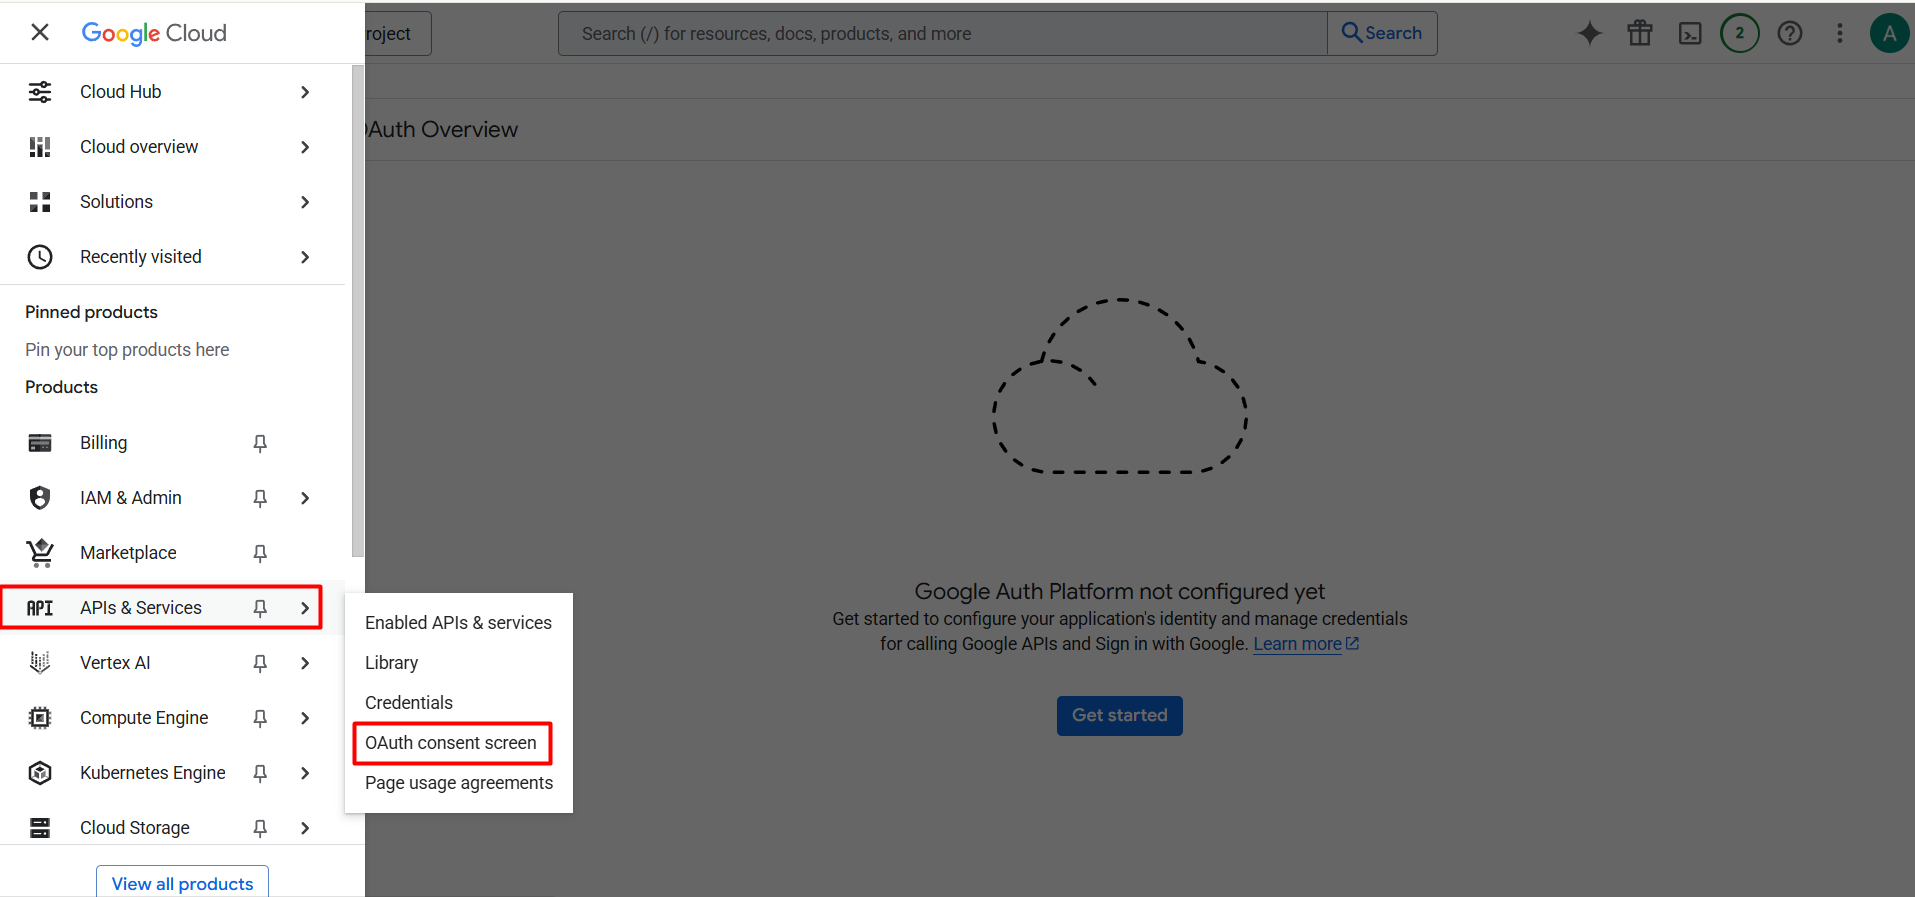
Step 8
Open APIs & Services → OAuth consent screen
▾
9
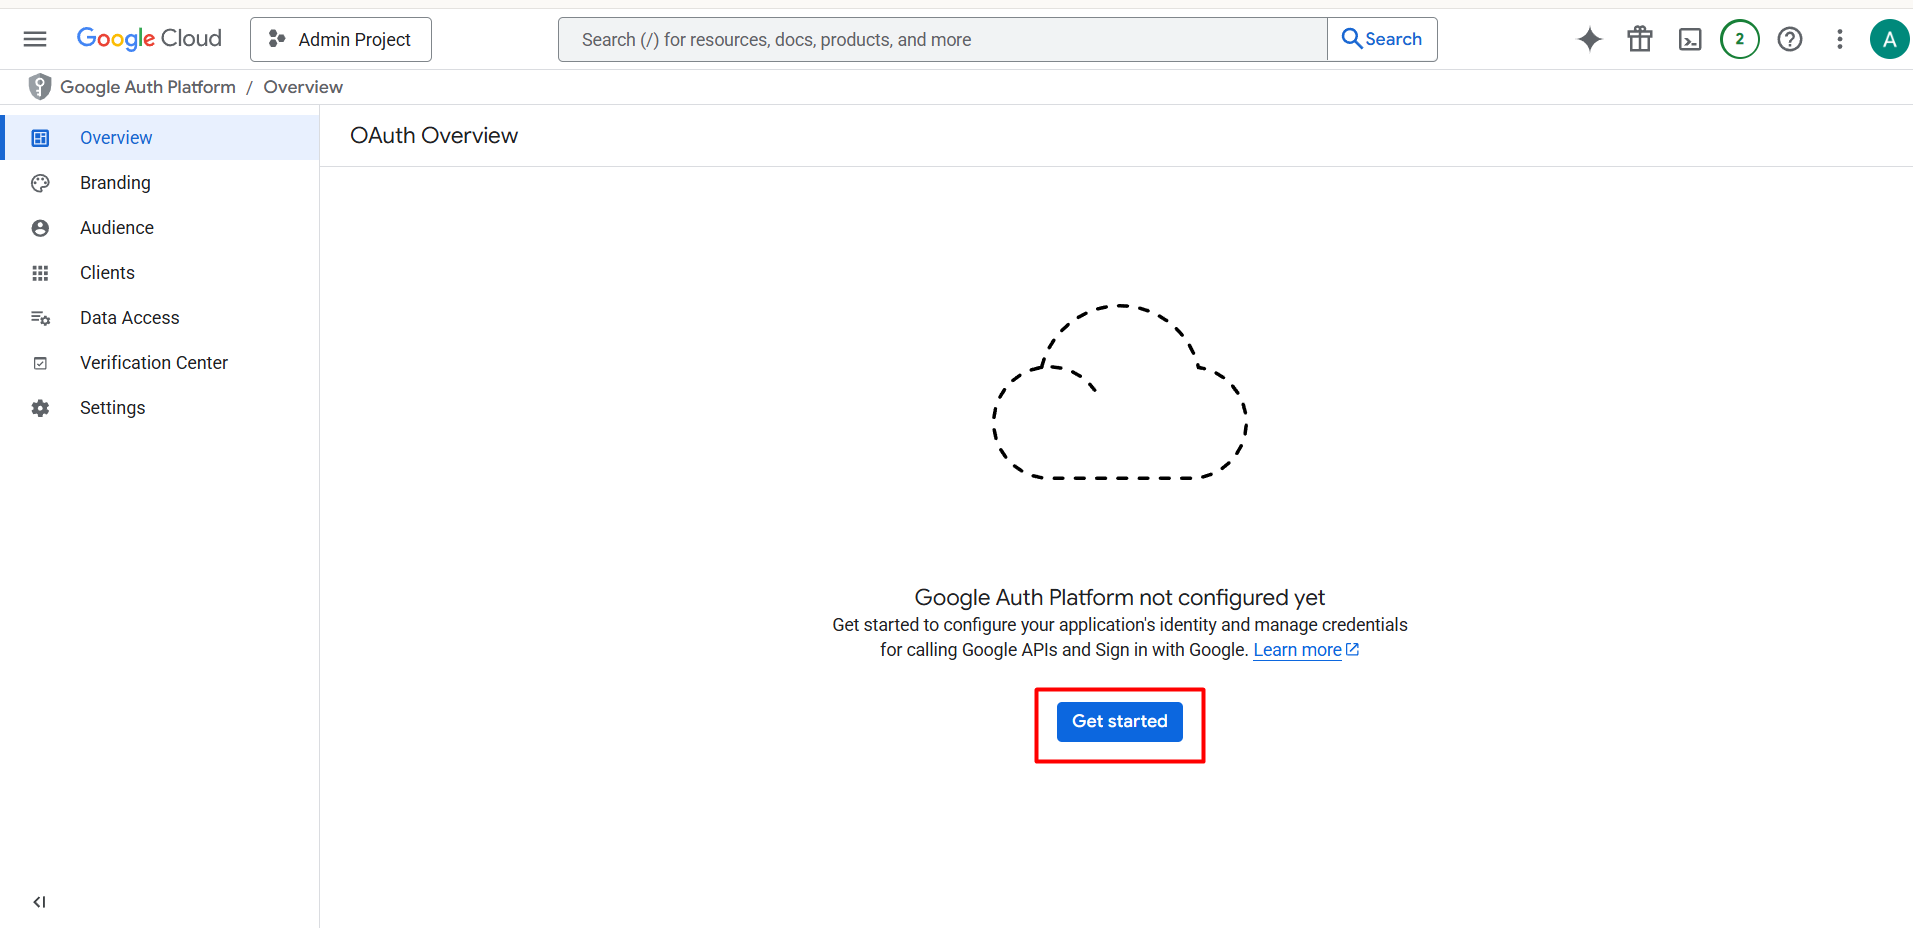
Step 9
Click "Get Started"
▾
10
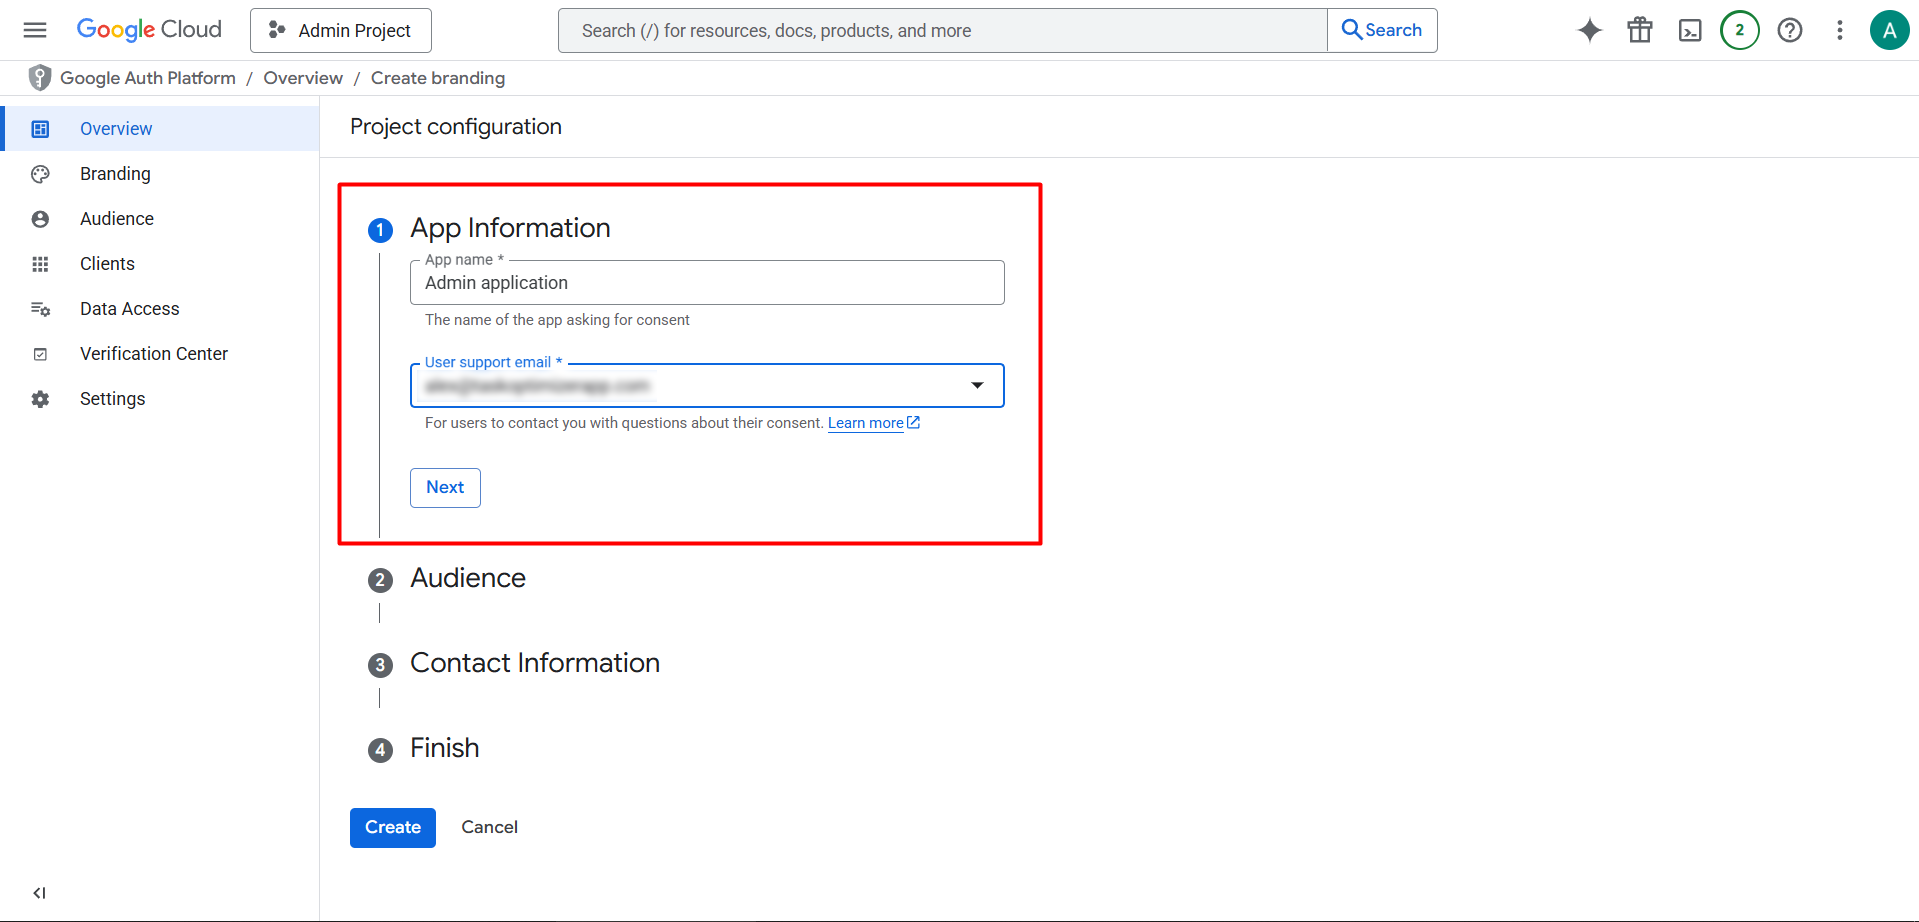
Step 10
Enter app information and click "Next"
▾
11
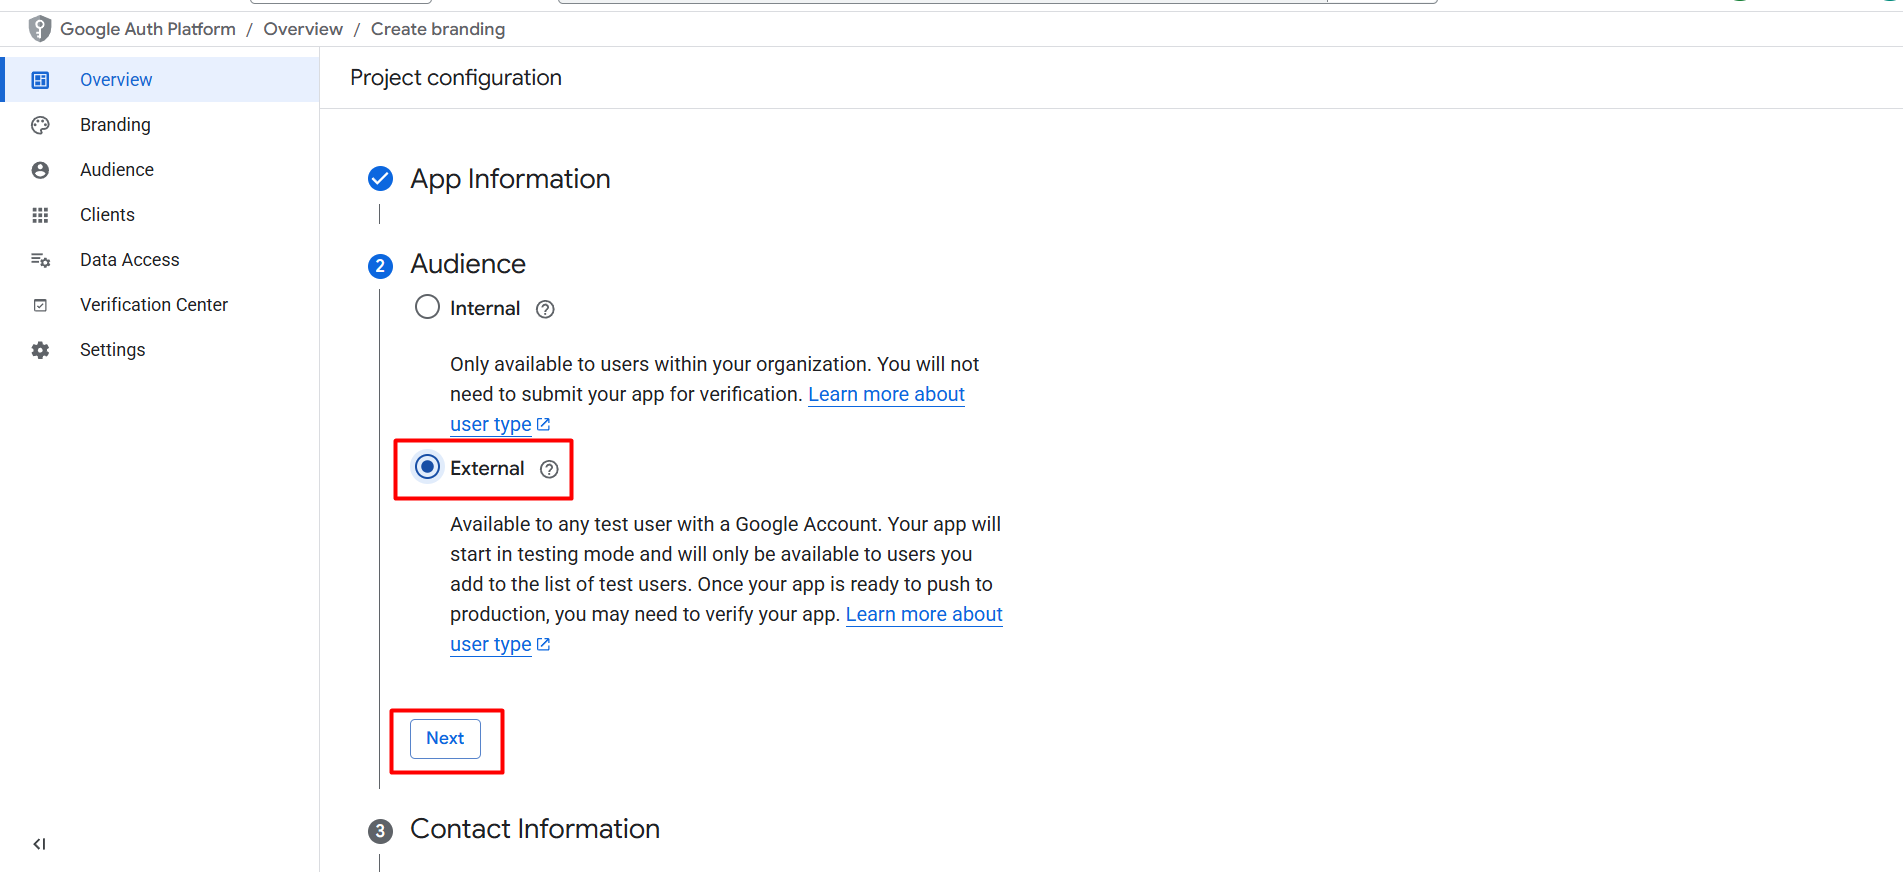
Step 11
Choose "External" and click "Next"
▾
12
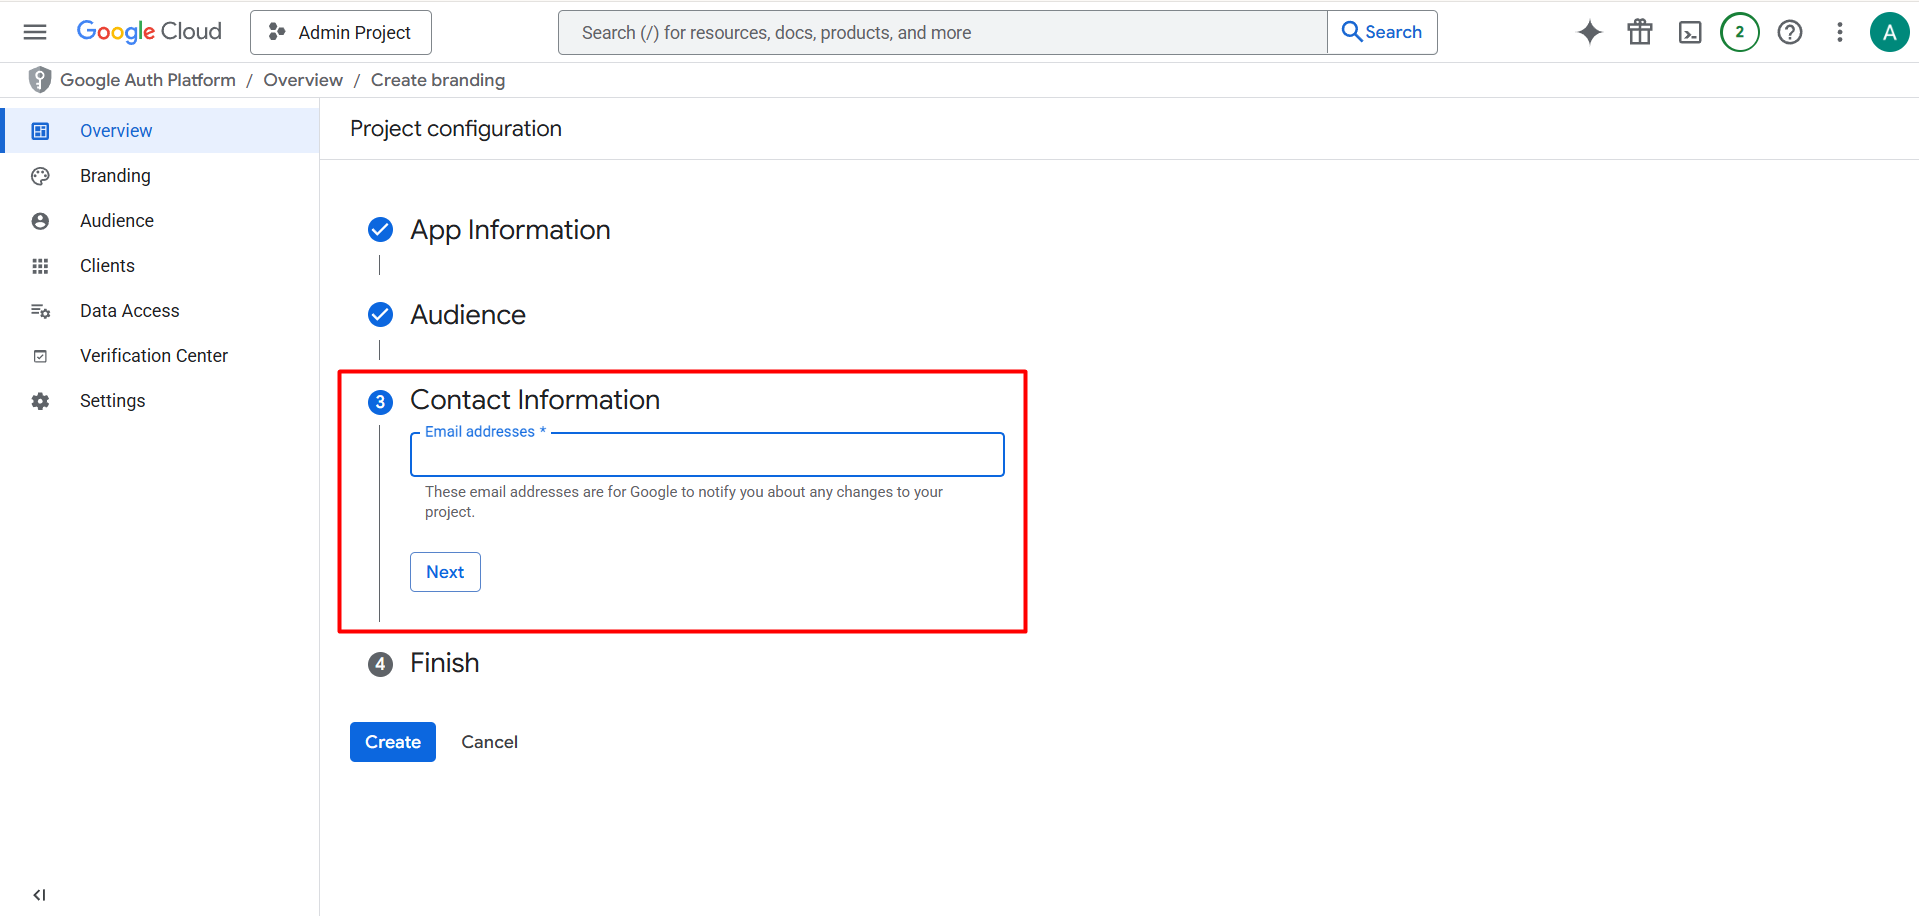
Step 12
Enter email address and click "Next"
▾
13
Step 13
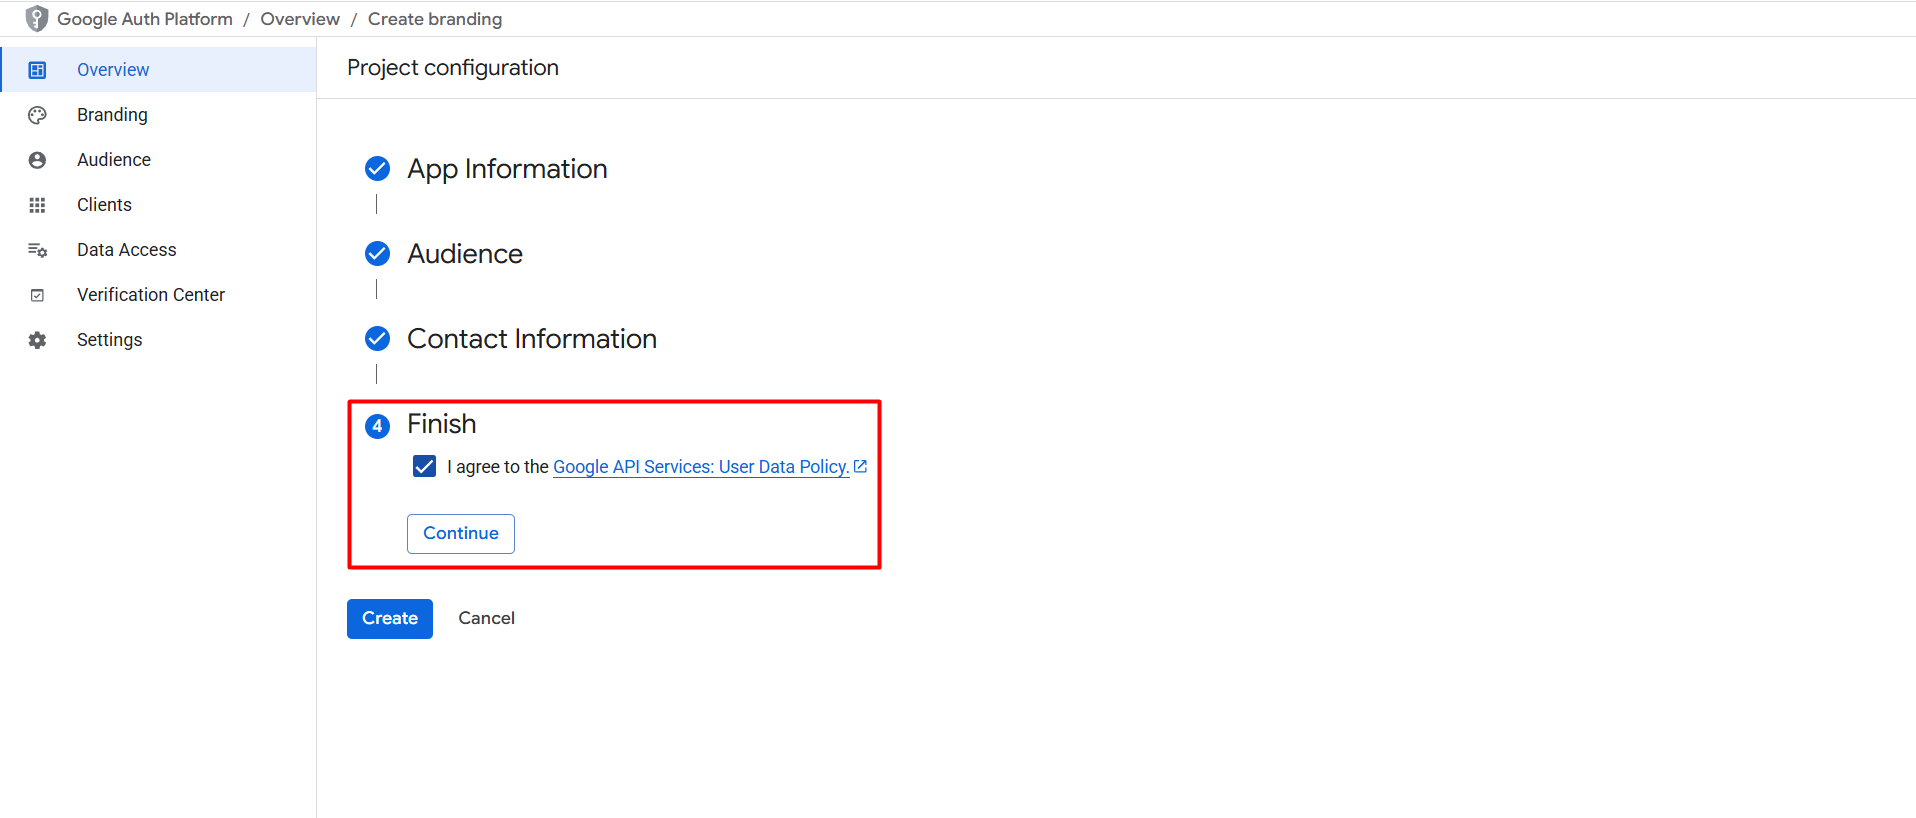
Accept terms and conditions, then click "Continue"
▾
14
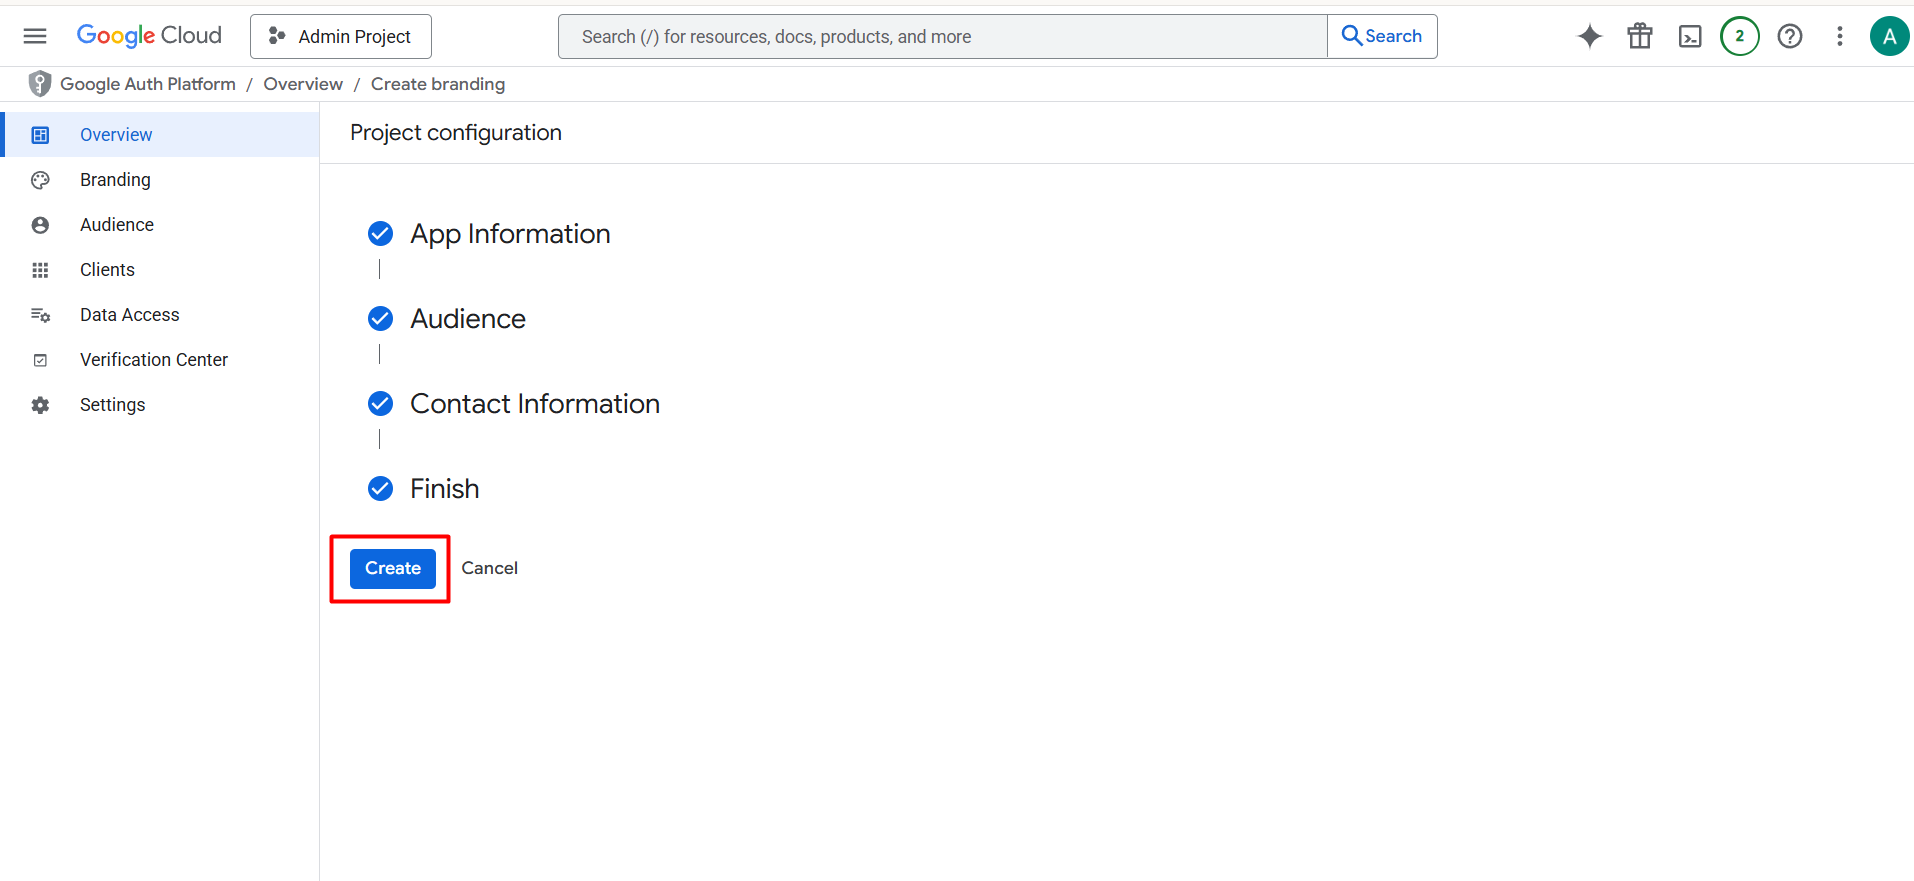
Step 14
Click "Create"
▾
15
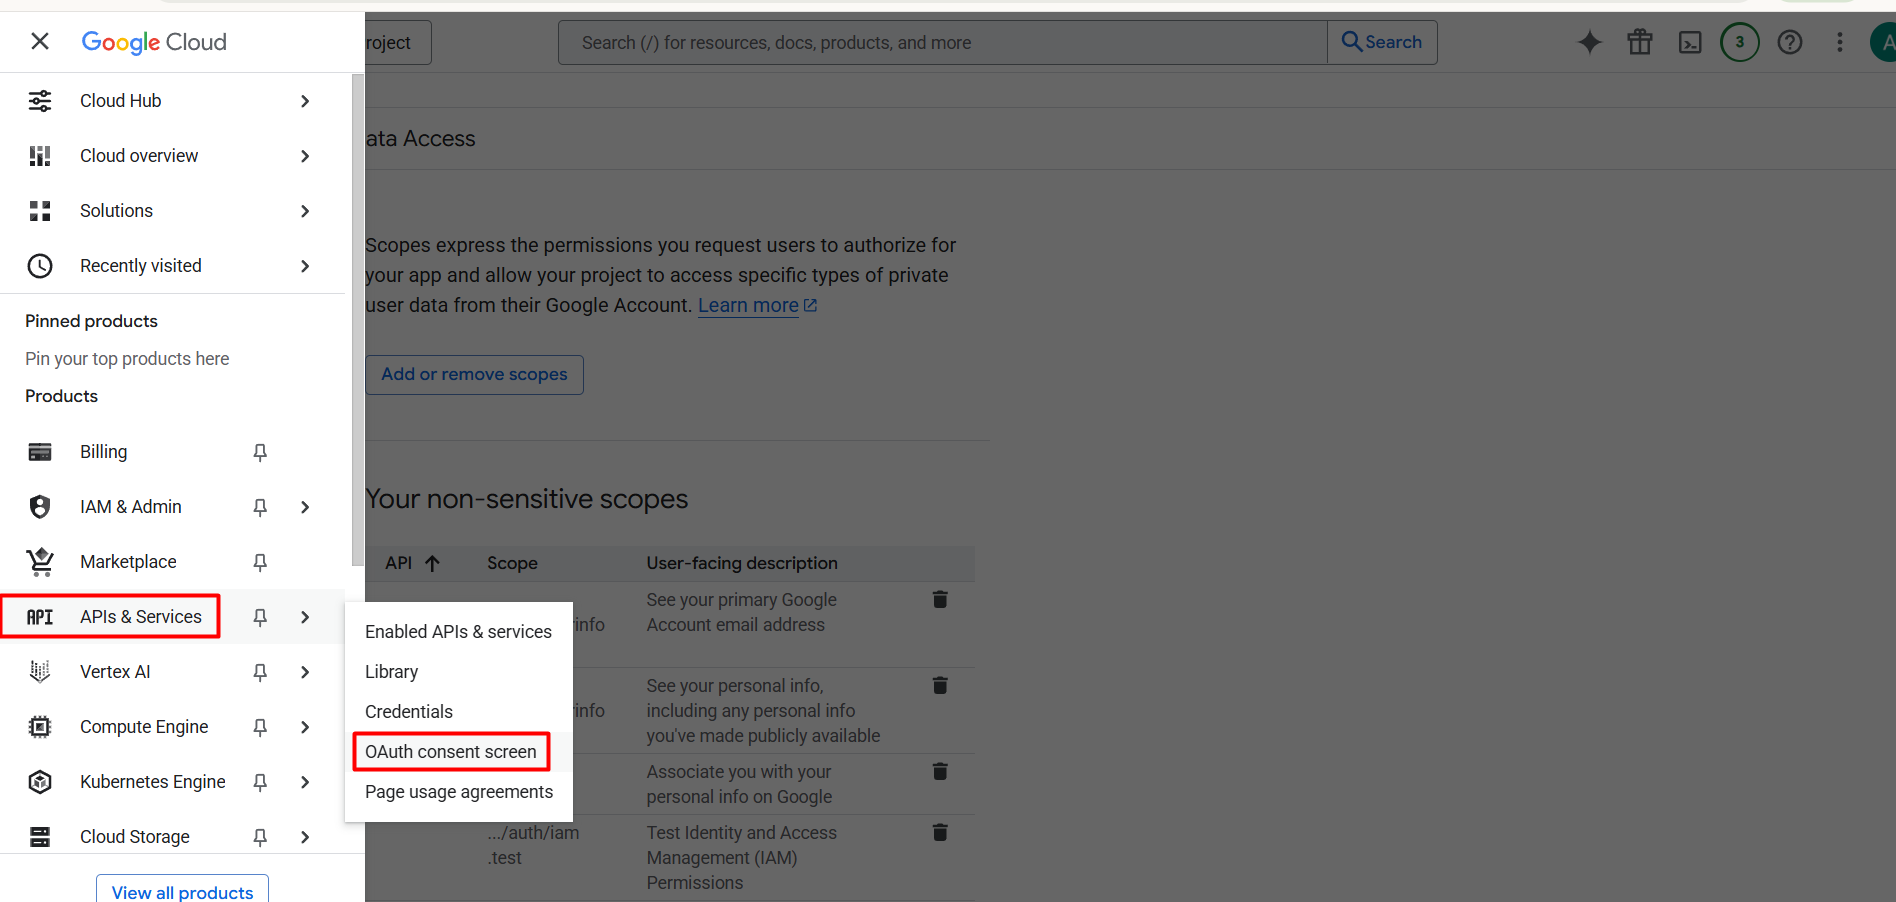
Step 15
Navigate to APIs & Services → OAuth consent screen (again)
▾
16
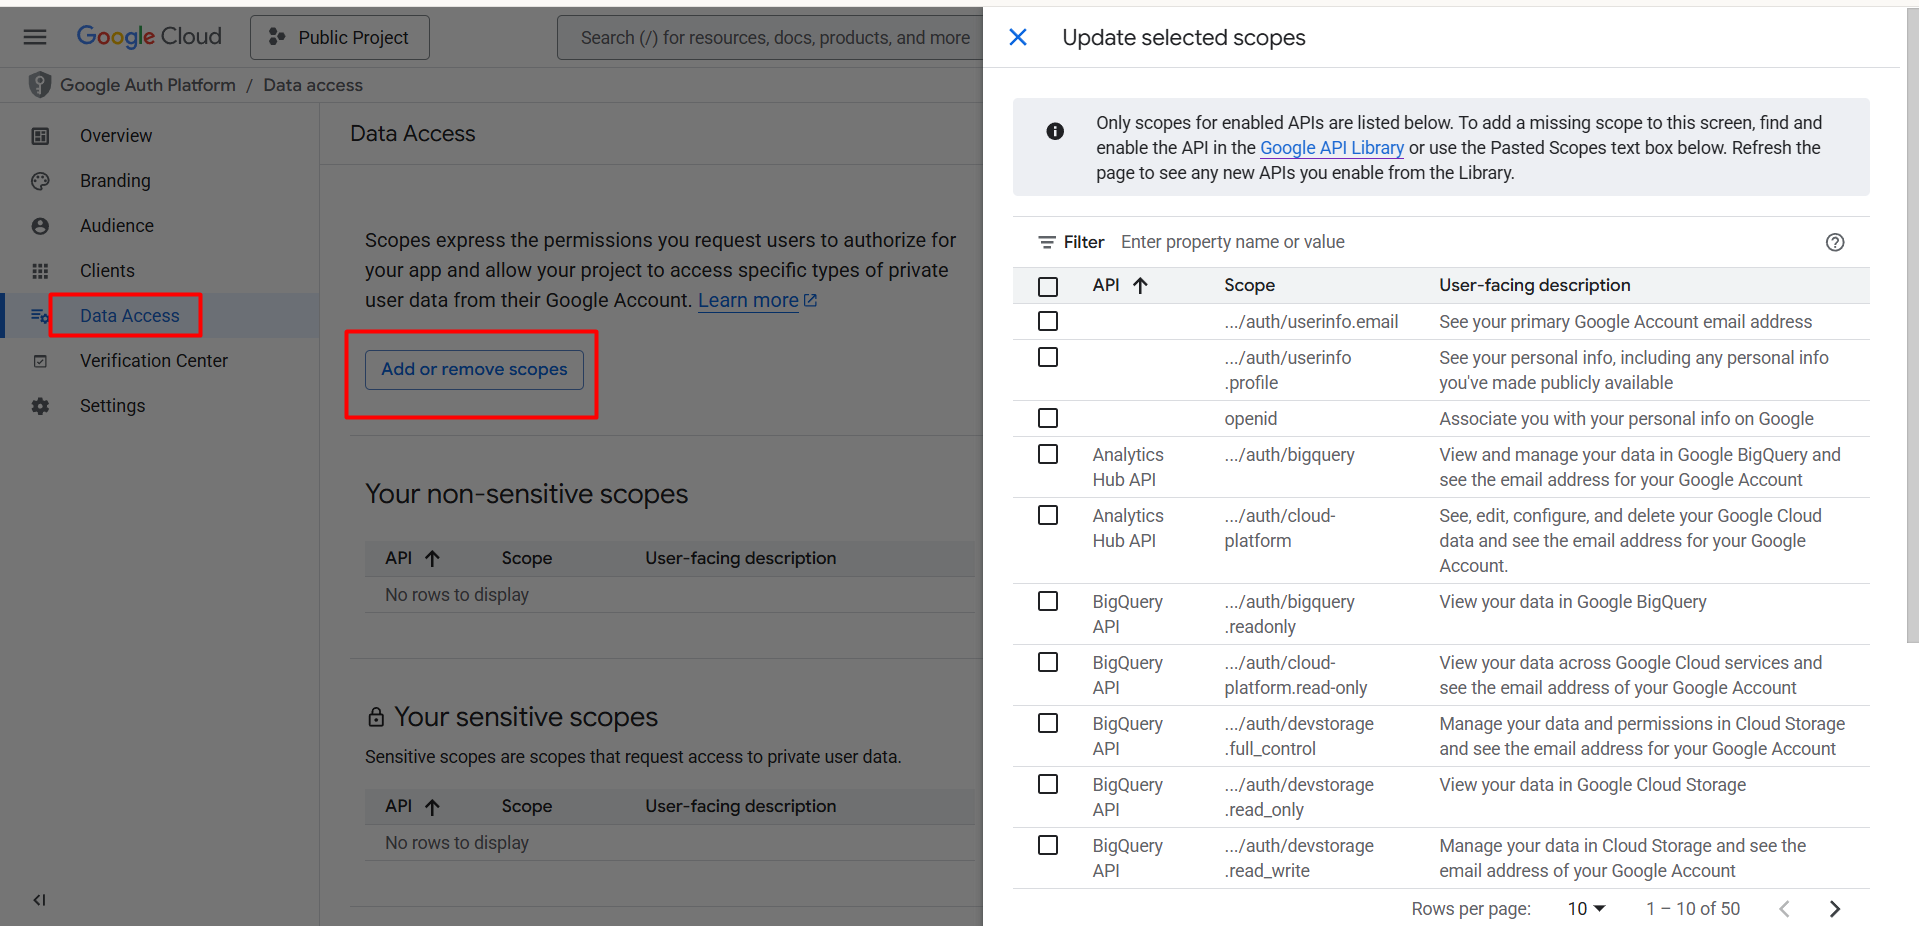
Step 16
Go to "Data Access" → click "Add or Remove Scopes" and add necessary scopes
▾
17
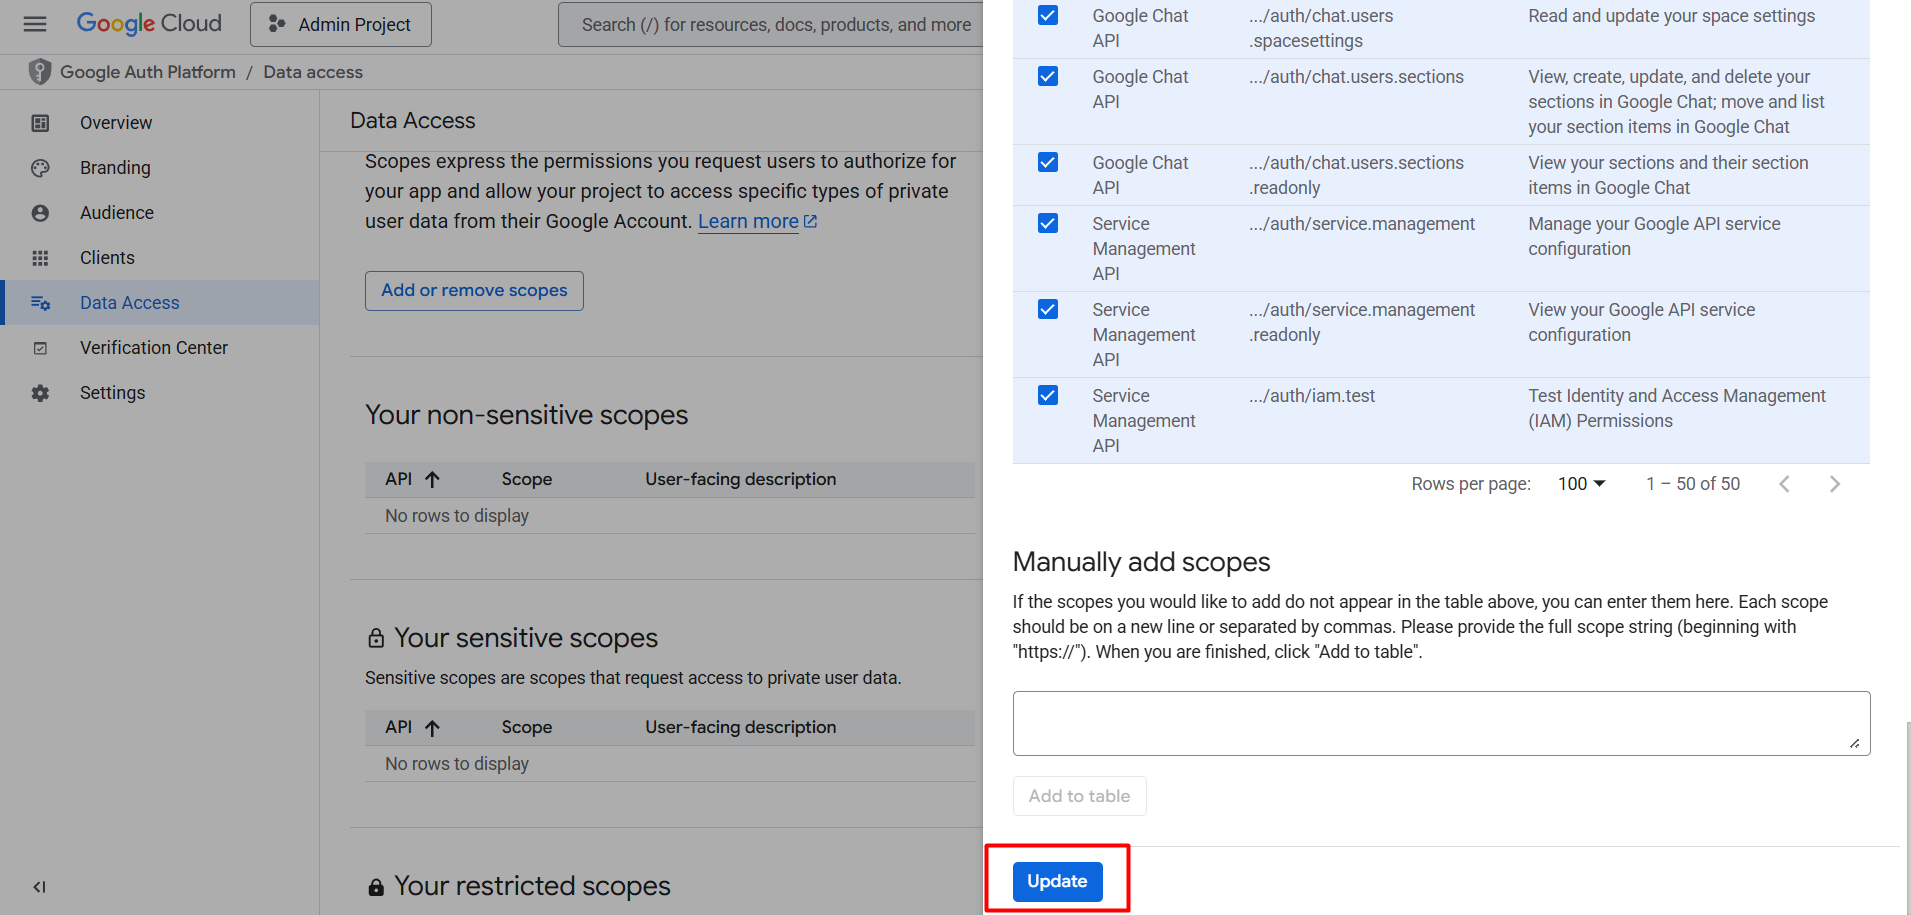
Step 17
After adding scopes, click "Update"
▾
18
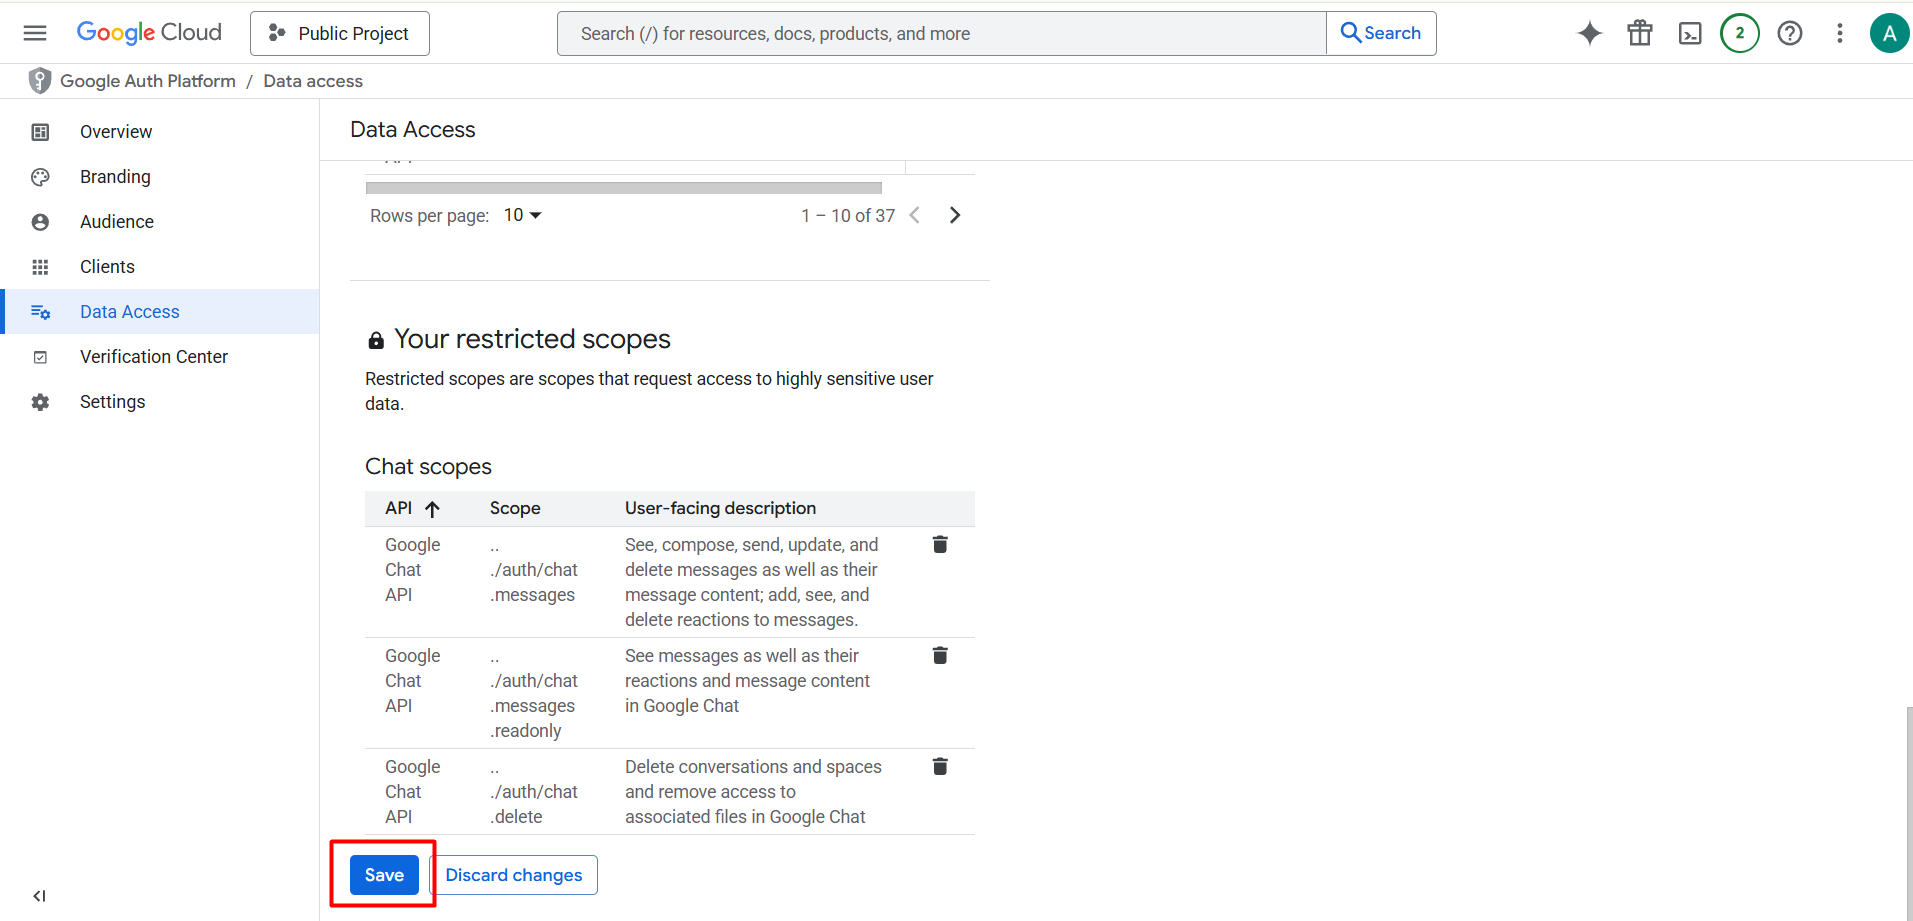
Step 18
Click "Save"
▾
19
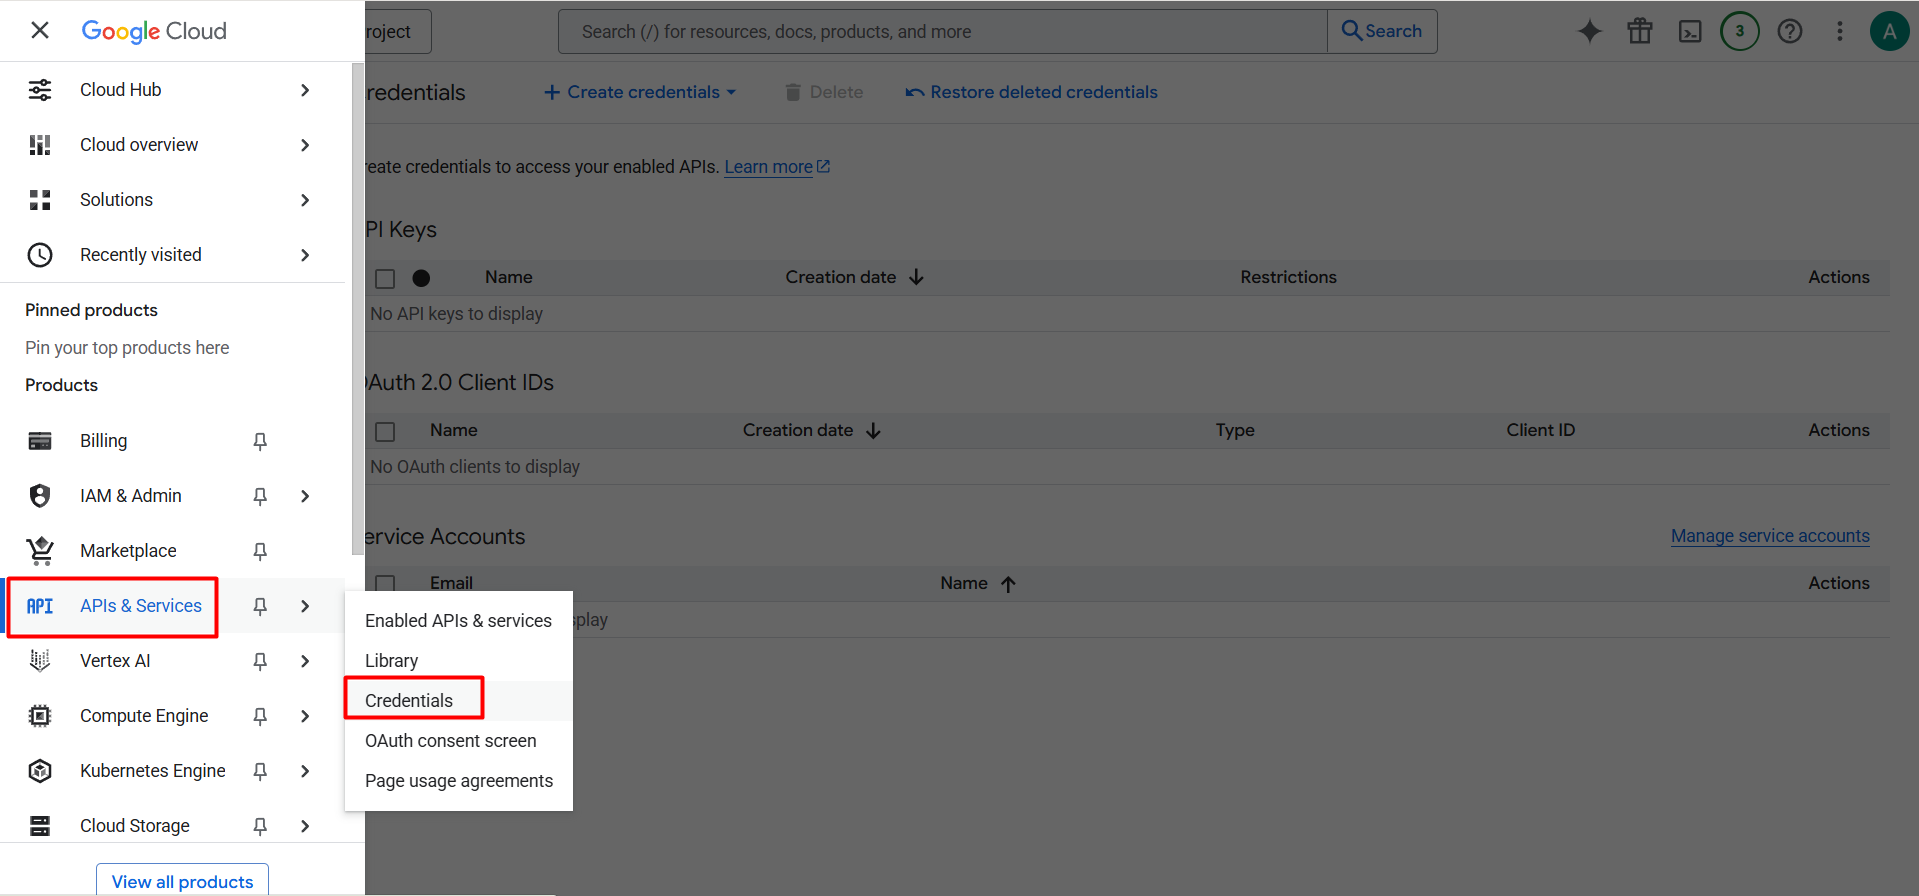
Step 19
Navigate to APIs & Services → Credentials
▾
20
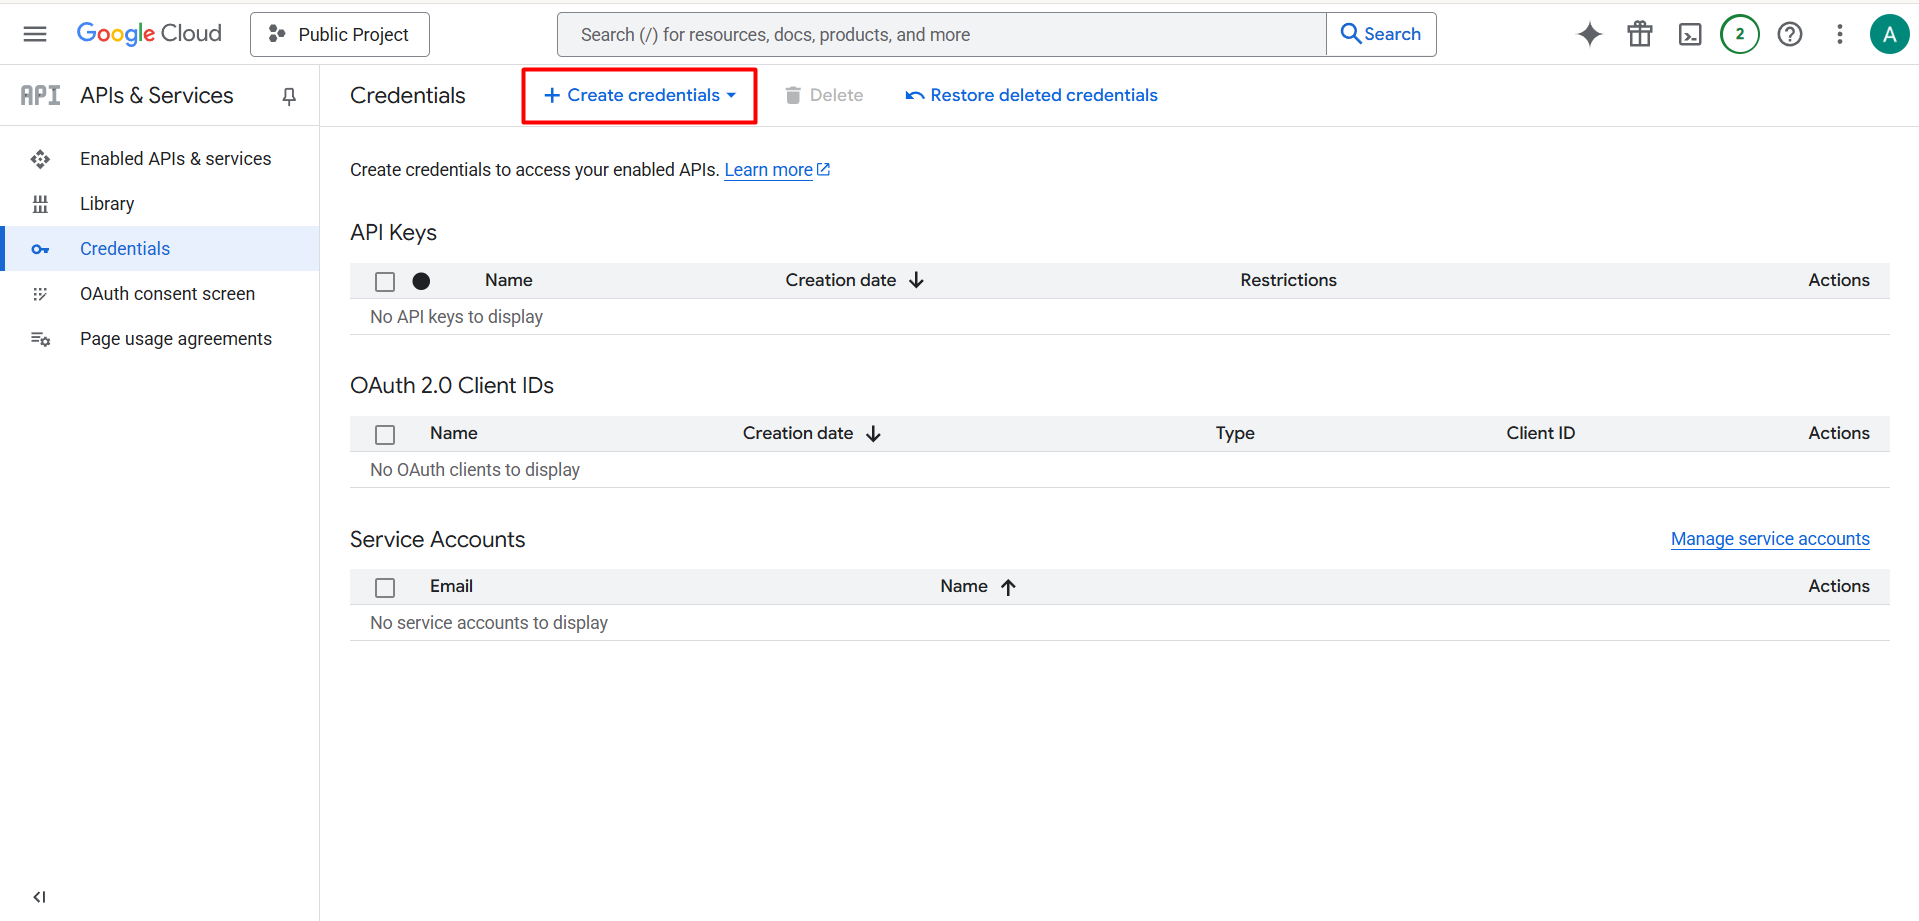
Step 20
Click "Create Credentials"
▾
21
Step 21
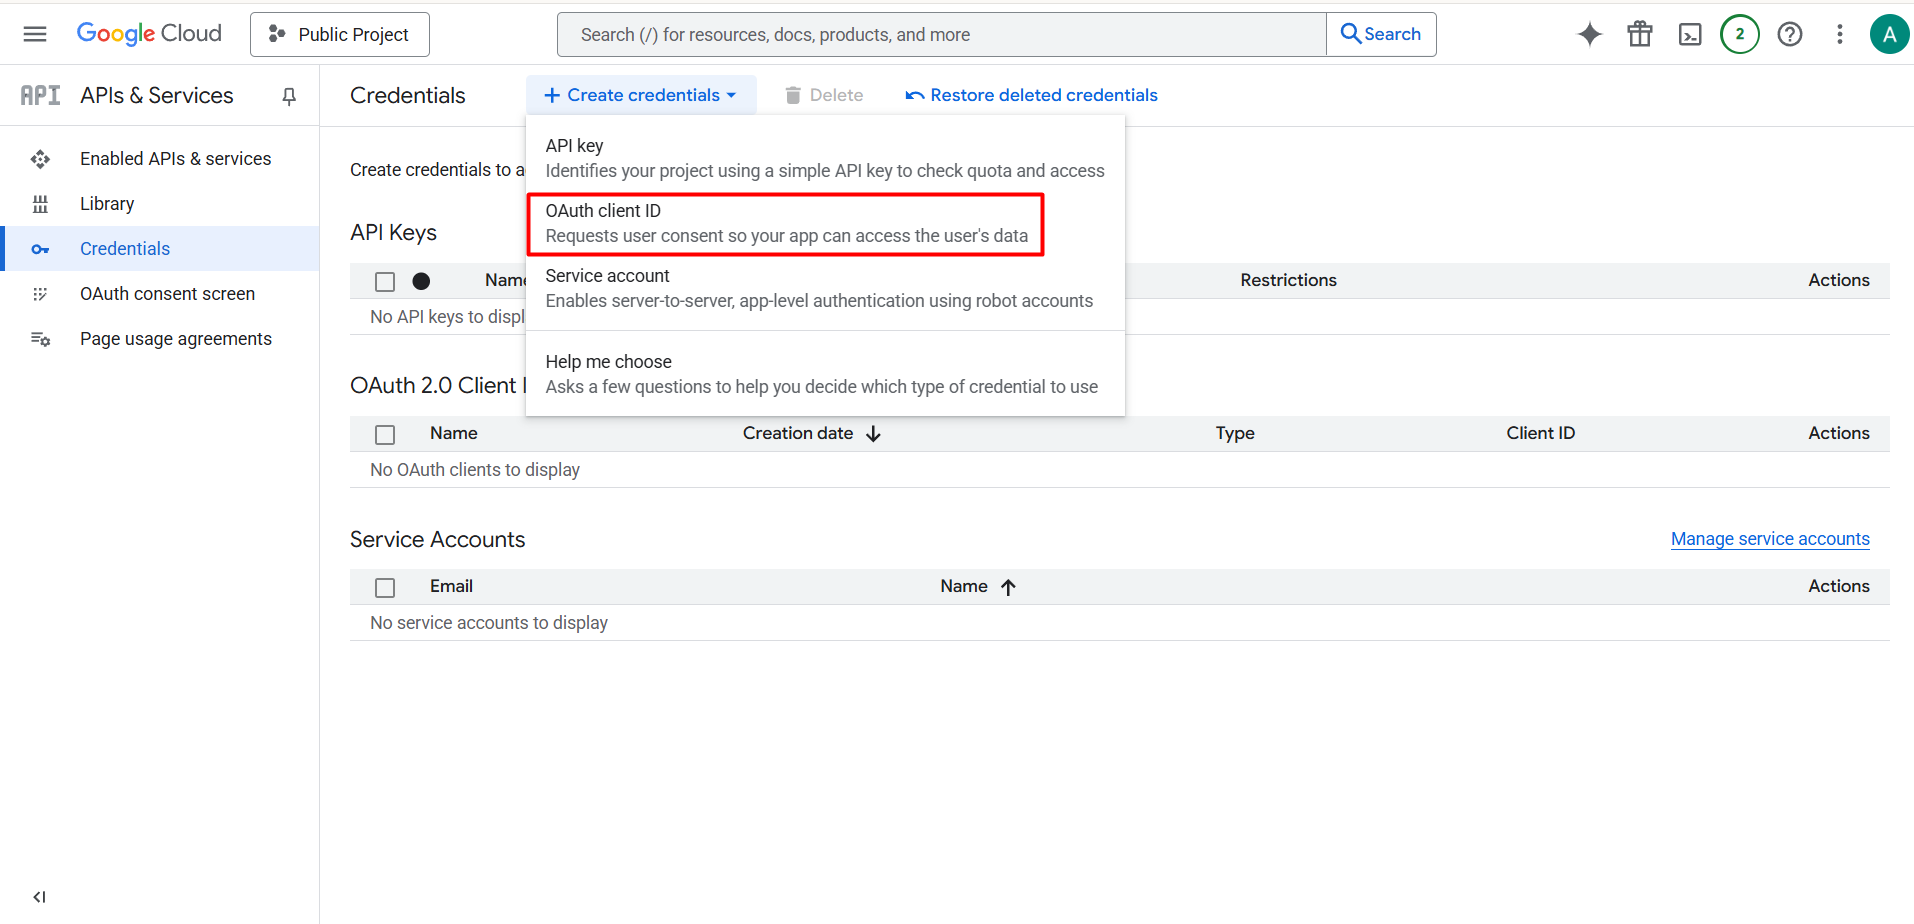
Select "OAuth Client ID"
▾
22
Step 22
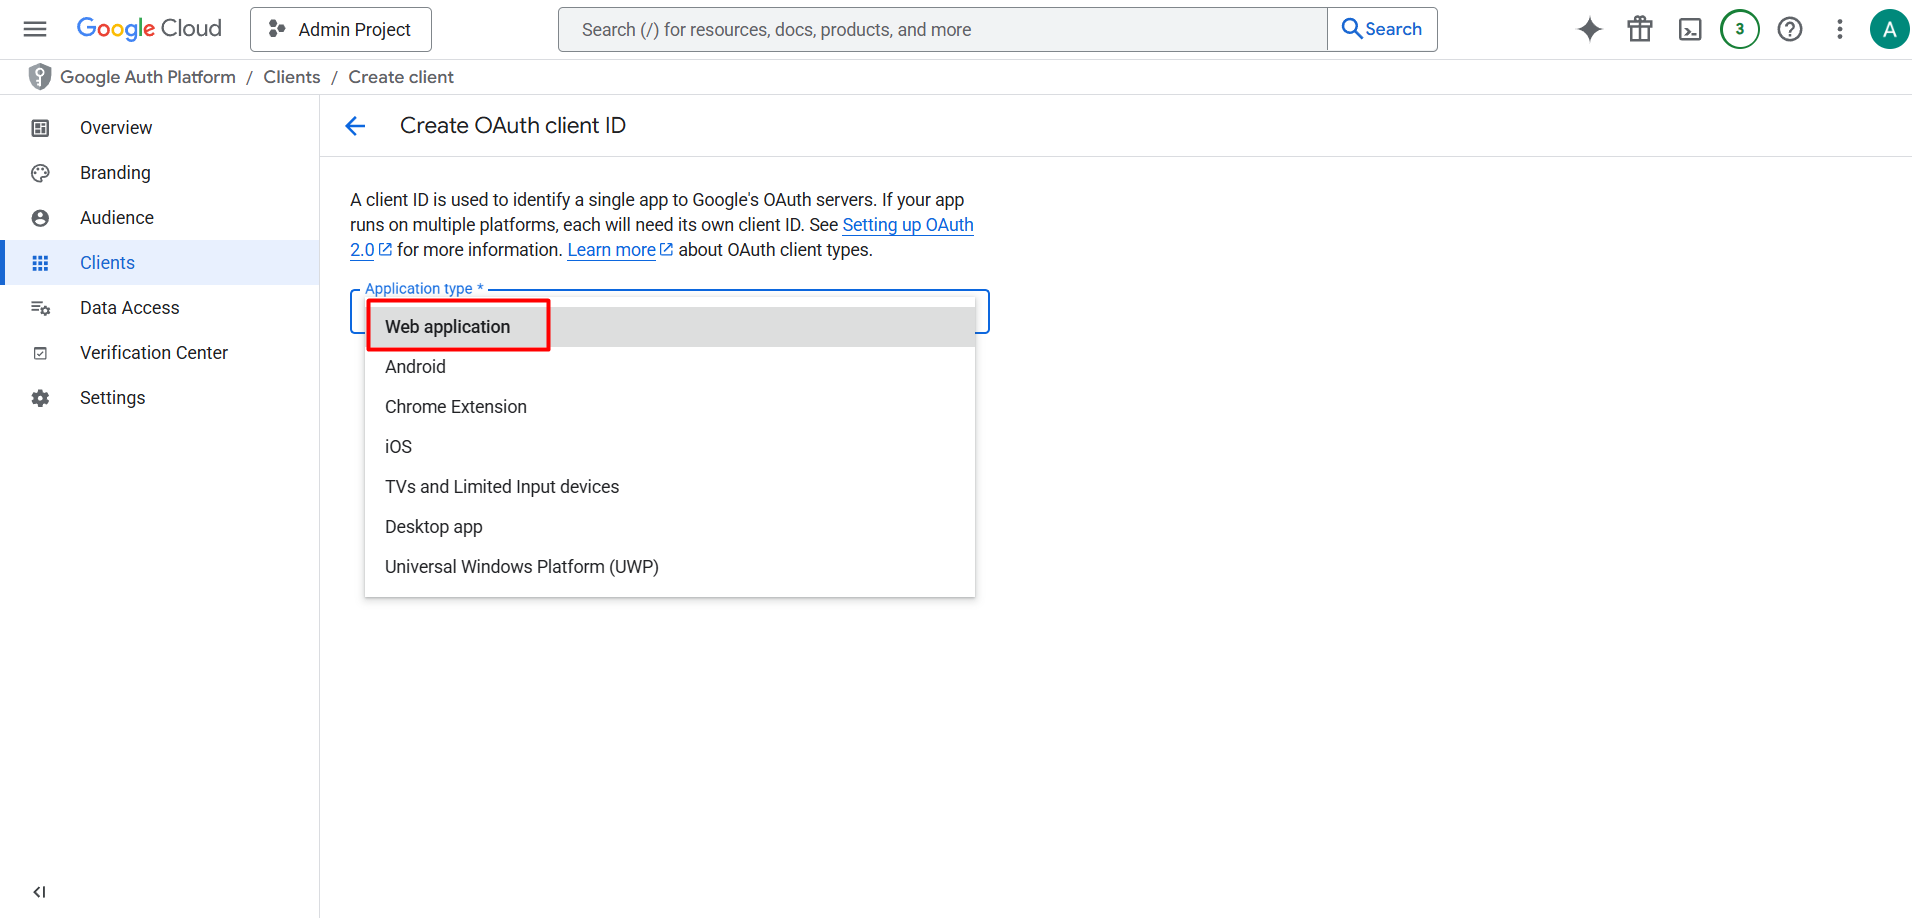
Select "Web Application"
▾
23
Step 23
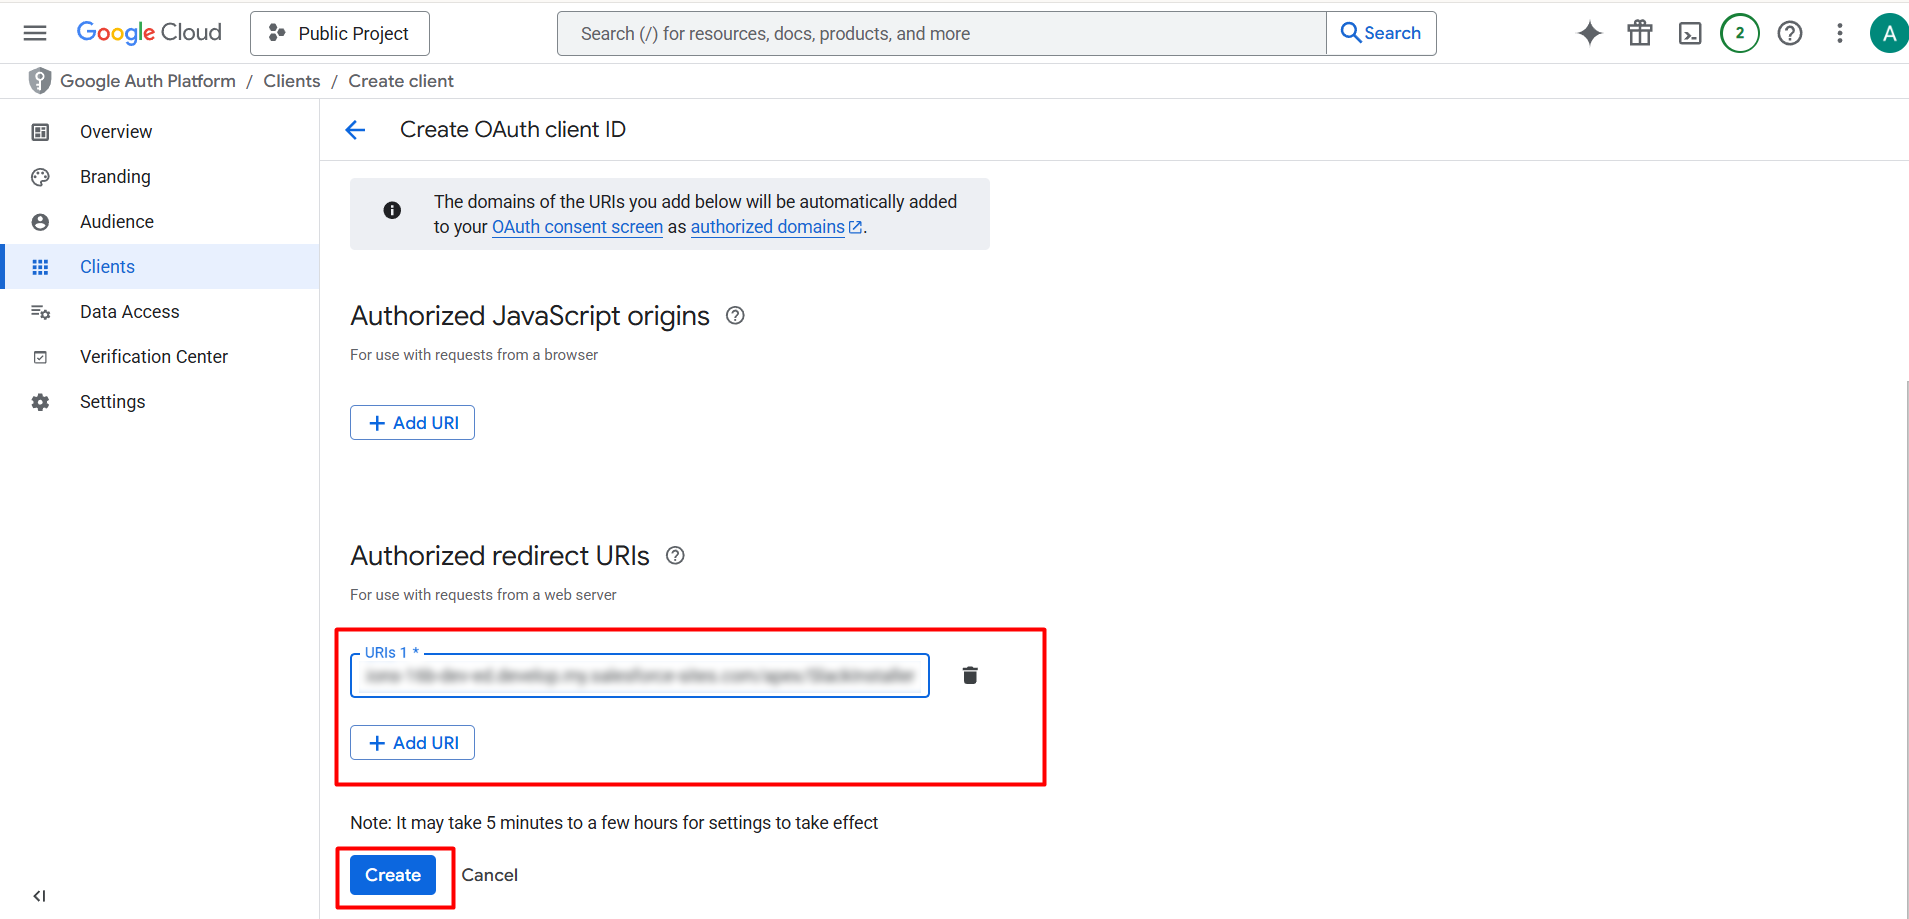
Add the Authorized Redirect URL and click "Create"
▾
24
Step 24
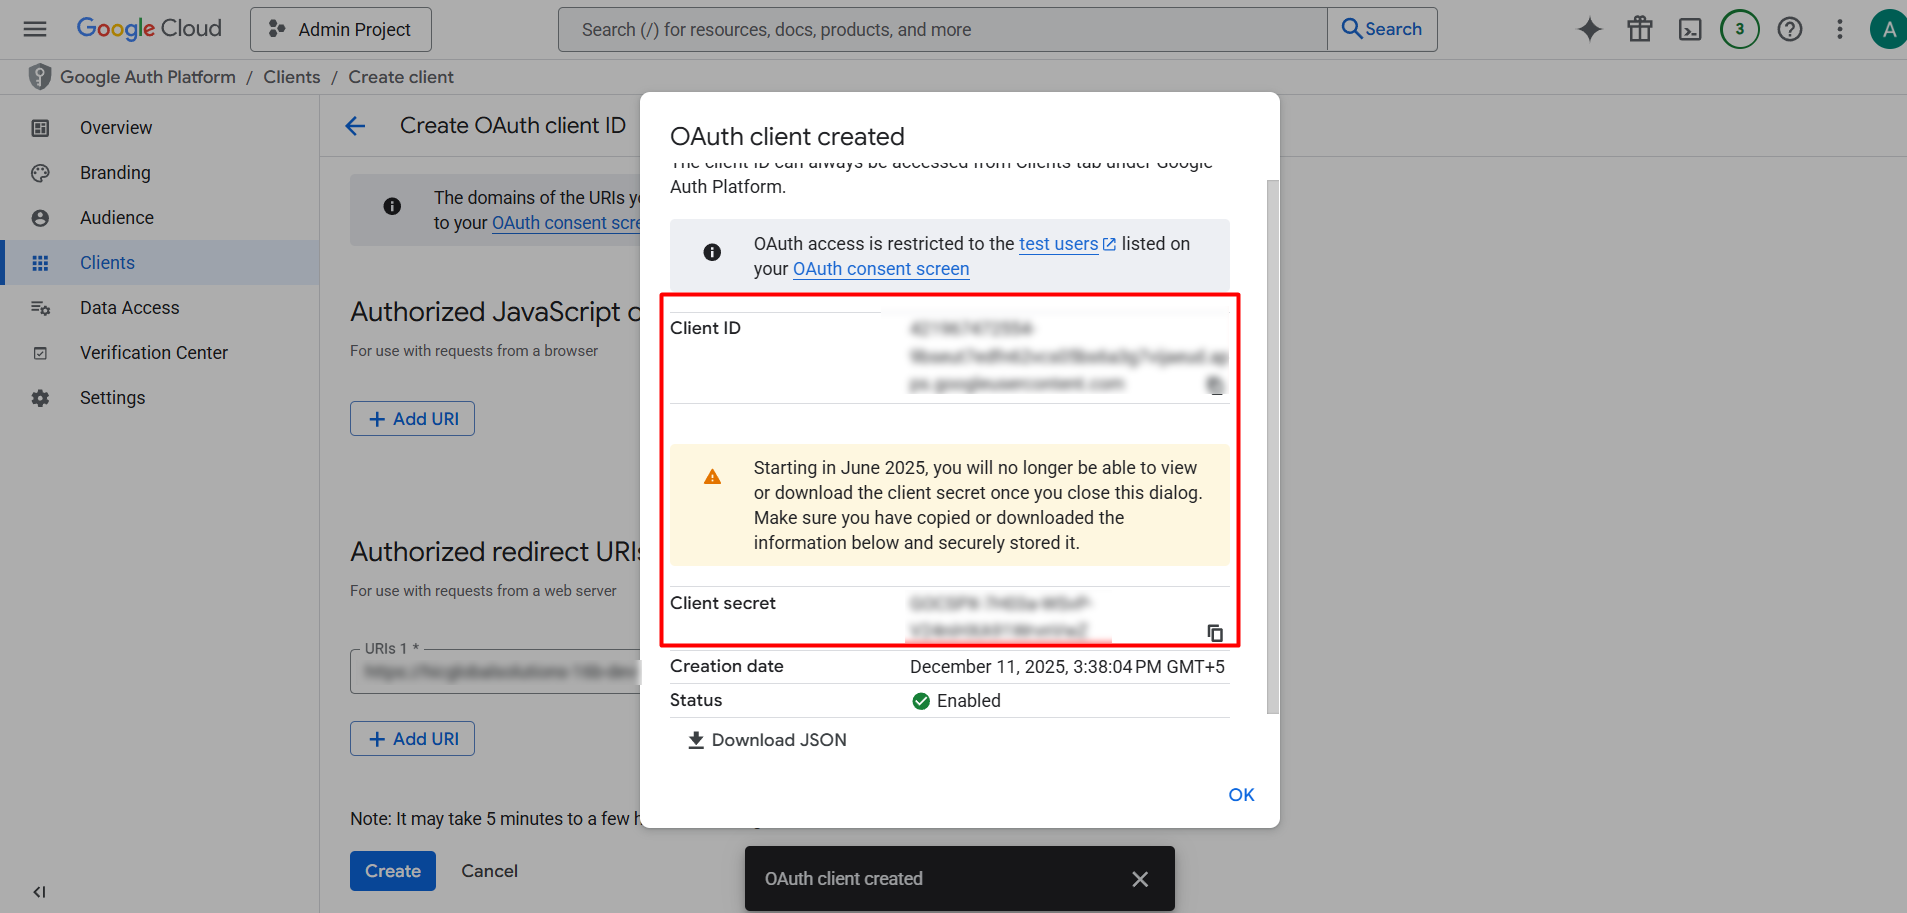
System generates Client ID and Client Secret ✓
▾
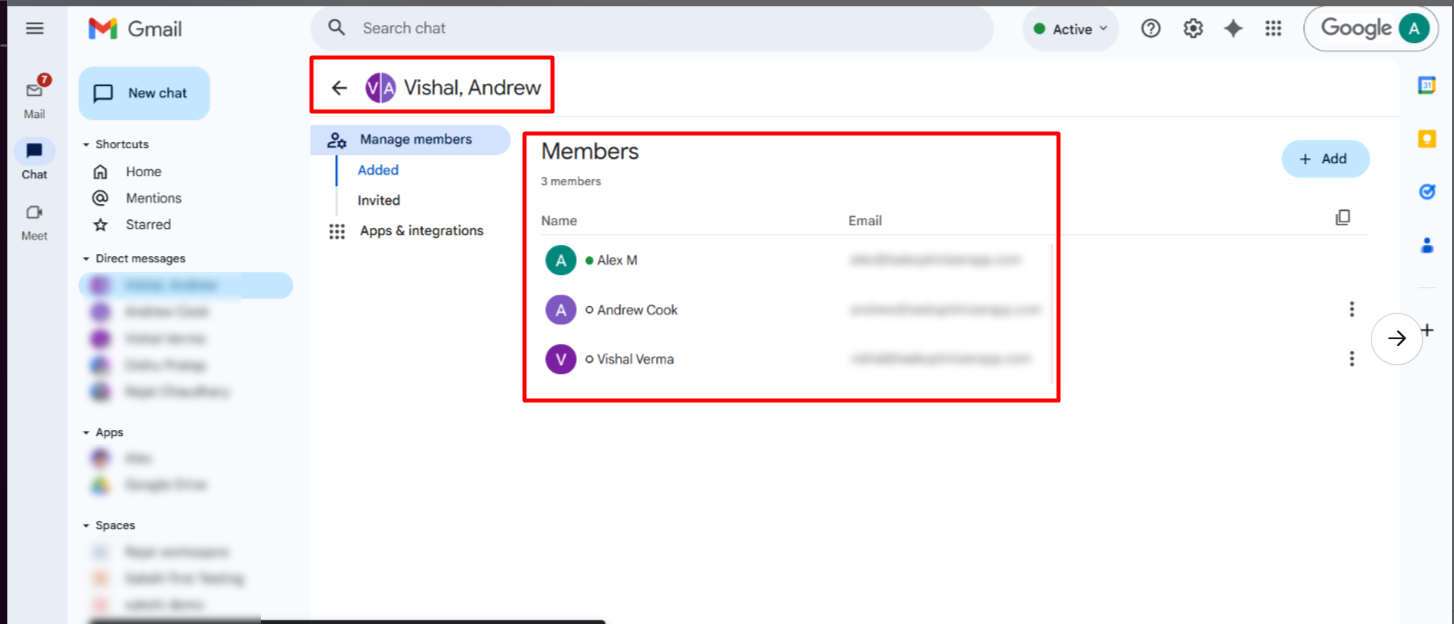
Direct messages with multiple participants are supported only for Internal Users. When External Users are included, the group DM cannot be created.
Admin Scopes
Public
Public / Non-Admin Setup — 23 Steps
1
Step 1
Navigate to
https://console.cloud.google.com▾
2
Step 2
Click the Project dropdown and select "New Project"
▾
3
Step 3
Enter project details and click "Create"
▾
4
Step 4
Navigate to APIs & Services → Library
▾
5
Step 5
Search "Google Chat API" and click the result
▾
6
Step 6
Click the Enable button
▾
7
Step 7
Open APIs & Services → OAuth consent screen
▾
8
Step 8
Click "Get Started"
▾
9
Step 9
Enter app information and click "Next"
▾
10
Step 10
Choose "External" and click "Next"
▾
11
Step 11
Enter email address and click "Next"
▾
12
Step 12
Accept terms and conditions, click "Continue"
▾
13
Step 13
Click "Create"
▾
14
Step 14
Navigate to APIs & Services → OAuth consent screen
▾
15
Step 15
Data Access → "Add or Remove Scopes" and add necessary scopes
▾
16
Step 16
Click "Update"
▾
17
Step 17
Click "Save"
▾
18
Step 18
Navigate to APIs & Services → Credentials
▾
19
Step 19
Click "Create Credentials"
▾
20
Step 20
Select "OAuth Client ID"
▾
21
Step 21
Select "Web Application"
▾
22
Step 22
Add Authorized Redirect URL and click "Create"
▾
23
Step 23
System generates Client ID and Client Secret
▾